A Comprehensive Guide to Editing Data in SuiteCRM
Welcome to my comprehensive guide on editing data in SuiteCRM! In this article, I’ll take you through the ins and outs of managing and updating data within SuiteCRM.
Hi everybody! In this article, I’m excited to share with you everything you need to know about Editing Data in SuiteCRM.
Now, if you’re here, chances are you already know how important it is to manage data effectively in your CRM system. Whether you’re a small business owner, a sales professional, or a marketing expert, the ability to effectively manage and update data is essential for success.
But before we get started, I’ve got something special for you. If you’re a visual learner or prefer a hands-on approach, be sure to check out my accompanying video tutorial on Editing Data in SuiteCRM.
By the end of this article, you’ll have the knowledge and skills to confidently manage and update data within SuiteCRM, streamlining your workflow and boosting your productivity. So, without further ado, let’s jump into the blog and explore the world of data editing in SuiteCRM together!
Update One Record
Case 1: Update One Record
Let’s kick things off with the basics, starting with a simple standard case: updating one record.
For instance, suppose we open a record and find a mistake in the name or contact information. We can easily make the necessary changes and save the record, updating the data in our CRM system.
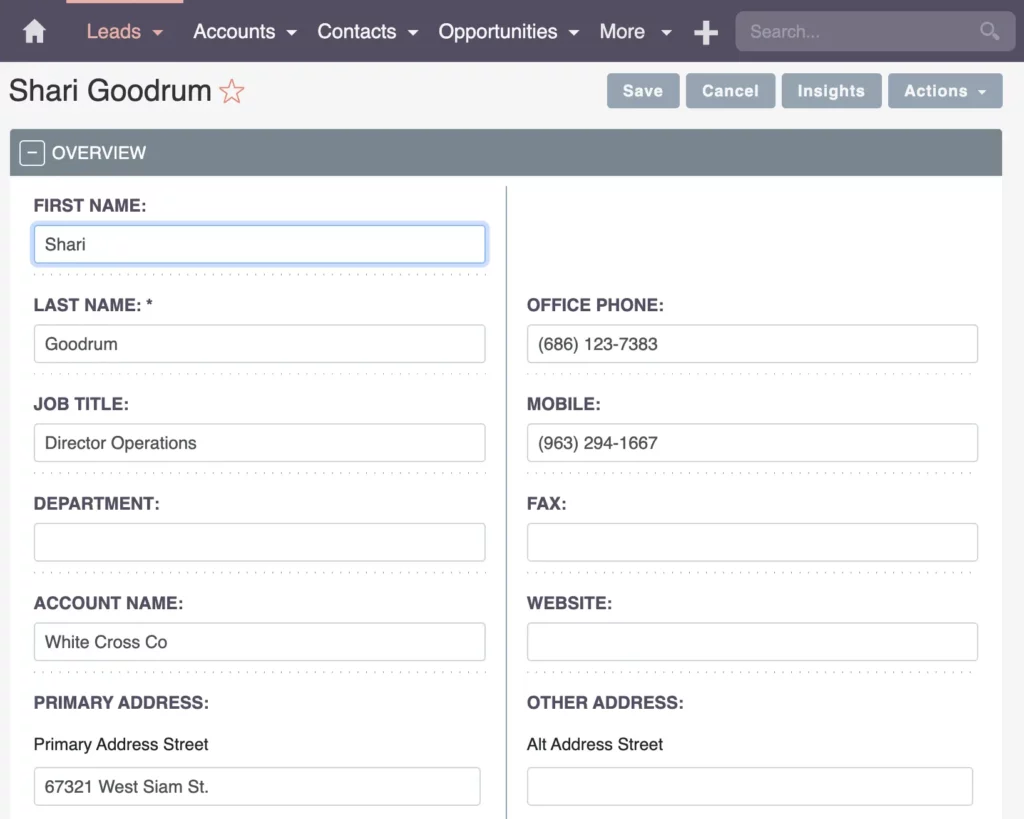
SuiteCRM’s interface is really user-friendly, making it quick and intuitive to update individual records.
Mass Update
Case 2: Update Multiple Records – Mass Update
But what if you’ve got a bunch of records to update at once? Now, that’s where the mass update feature comes in handy! This is perfect when you’ve got lots of records needing changes in one go.
Here’s how it works: In the list view, you filter and choose the records you want to update, then apply changes to all of them together.
Select All Records
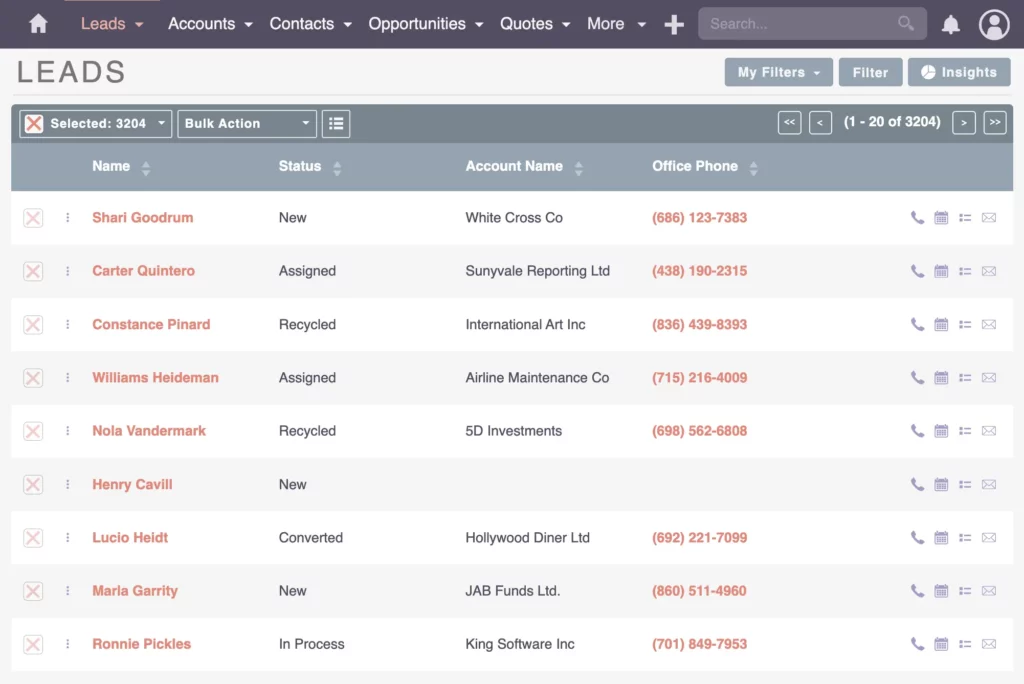
Select This Page
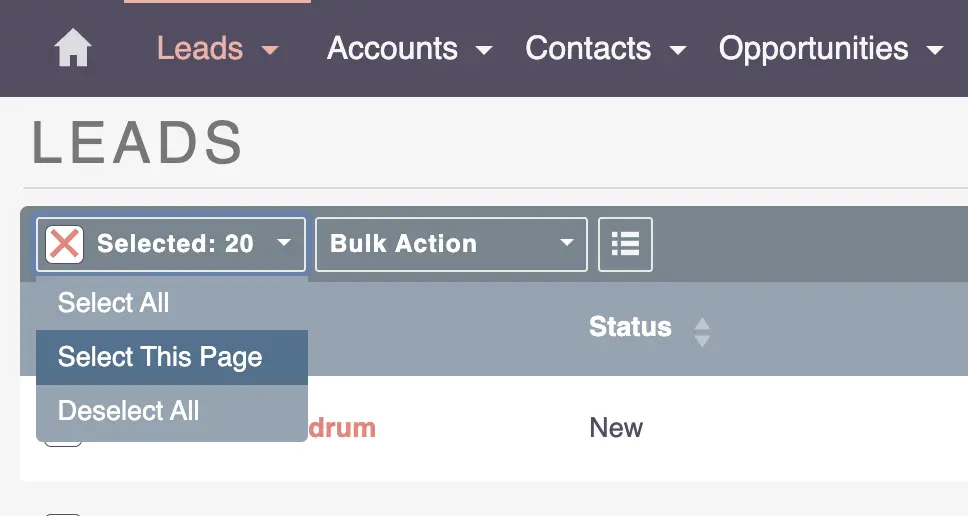
Bulk Action: Mass Update
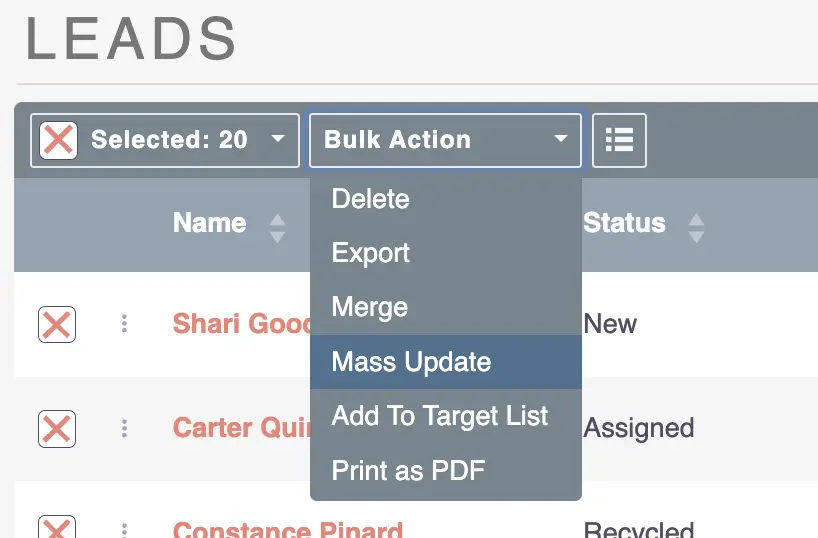
Just be careful – mass updates can have a big impact on your CRM data. Make sure you’re aware of the changes you’re making to keep your data accurate.
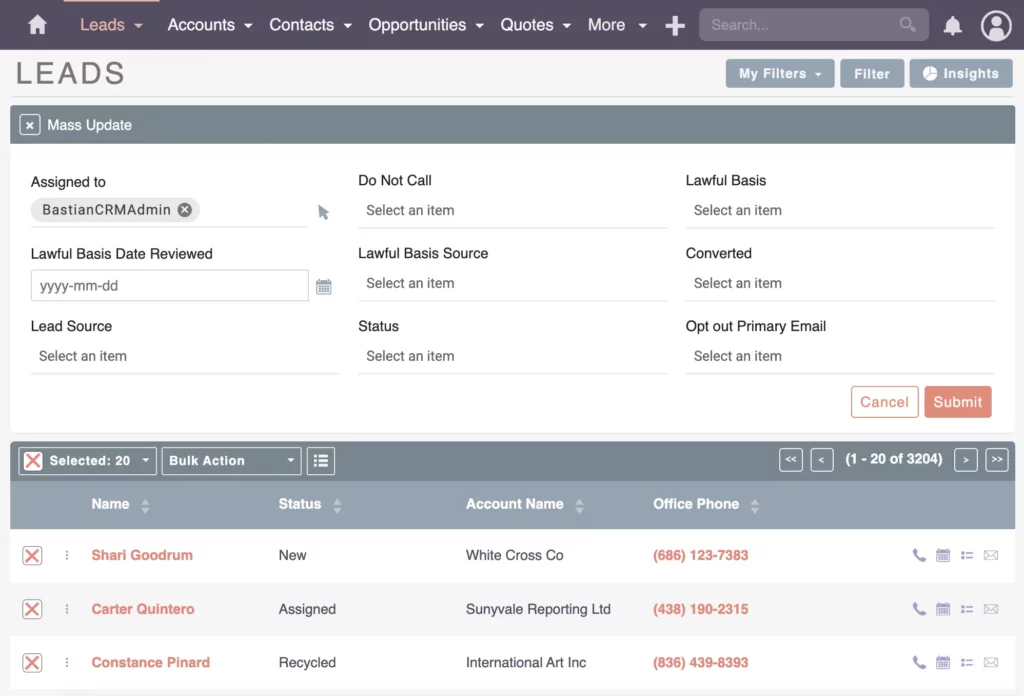
Click the Submit button and check to confirm that the selected records have been updated.
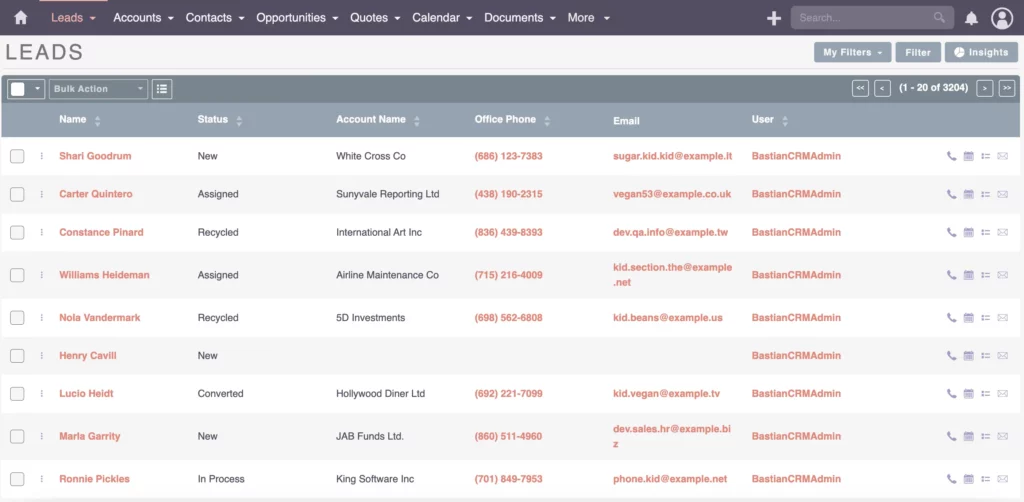
With this, you can make changes to a whole bunch of records all at once. Whether you’re reassigning leads or updating contact details, Mass Update is a real time-saver.
Next up? Let’s group things together for a more organized view.
Excel
Case 3: Update Multiple Records – Excel
Now, if you’re dealing with more complex updates or big piles of data, Excel or LibreOffice Calc can be your best friend.
When you’re dealing with data changes in SuiteCRM, things can get tricky, especially with lots of records. SuiteCRM lets you export your data into Excel, where you can make all sorts of changes or add extra details.
Once you’ve made your updates in Excel, simply import the file back into SuiteCRM. This method ensures accuracy, especially when handling large amounts of data.
Exporting Data from SuiteCRM to Excel
Let’s dive into exporting data into Excel and solving data discrepancies.
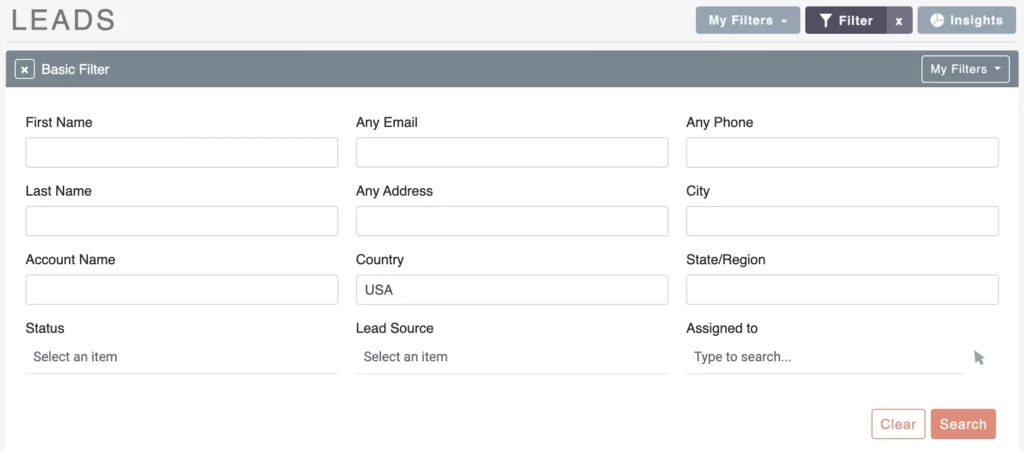
In this example, we’re facing discrepancies in our data, particularly with country names. When we search for “Country: USA,” we obtain one set number of records, while “United States” yields a different count. This inconsistency suggests problems with our data sources.
“USA”
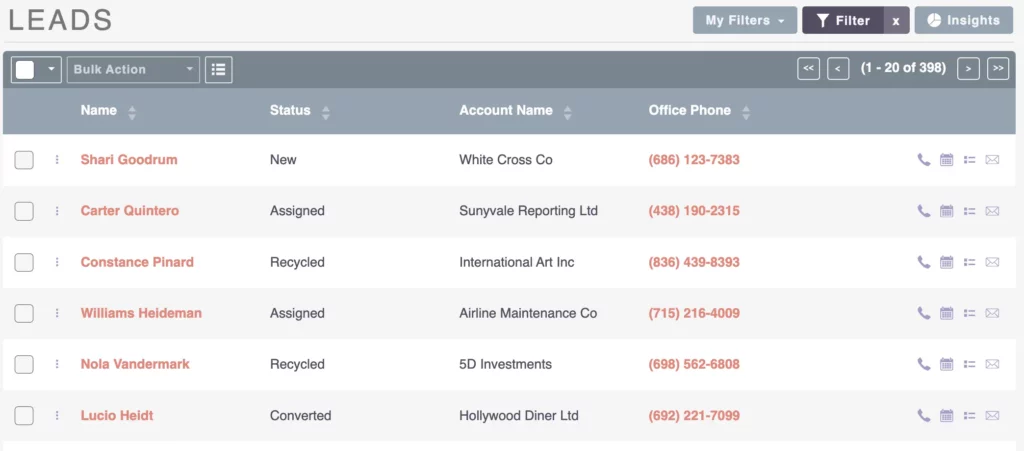
“United States”
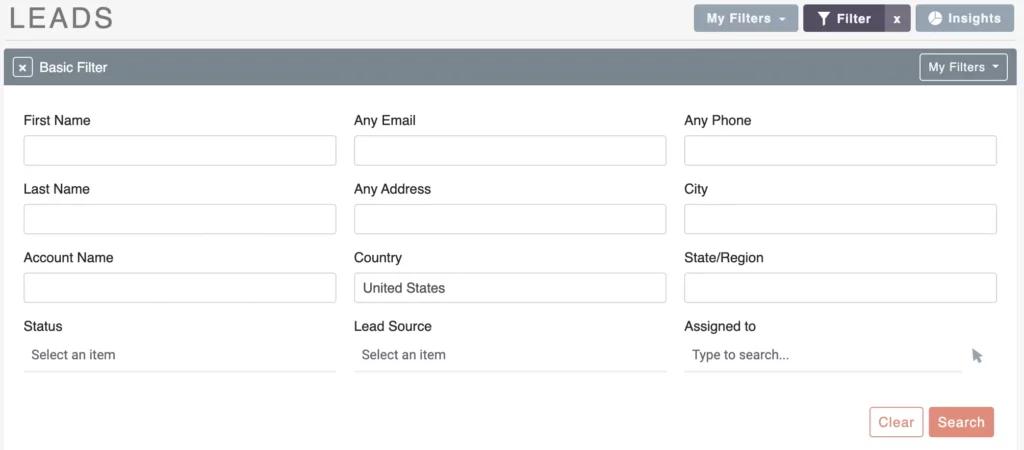
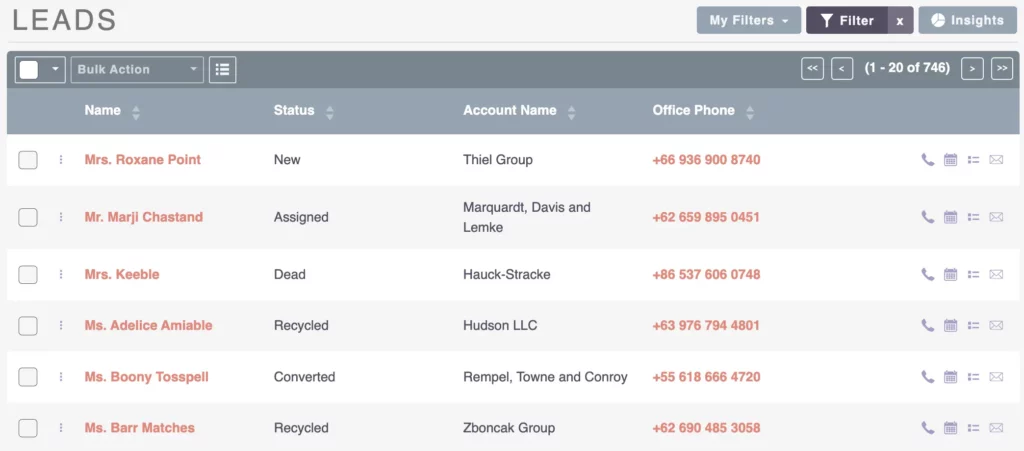
Upon investigation, we find that during two separate imports, country names varied between “USA” and “United States.” Such inconsistencies can skew data and lead to inaccurate reports. To fix this, we need to ensure uniformity in our data.
To address this issue, we export the records with the incorrect country name.
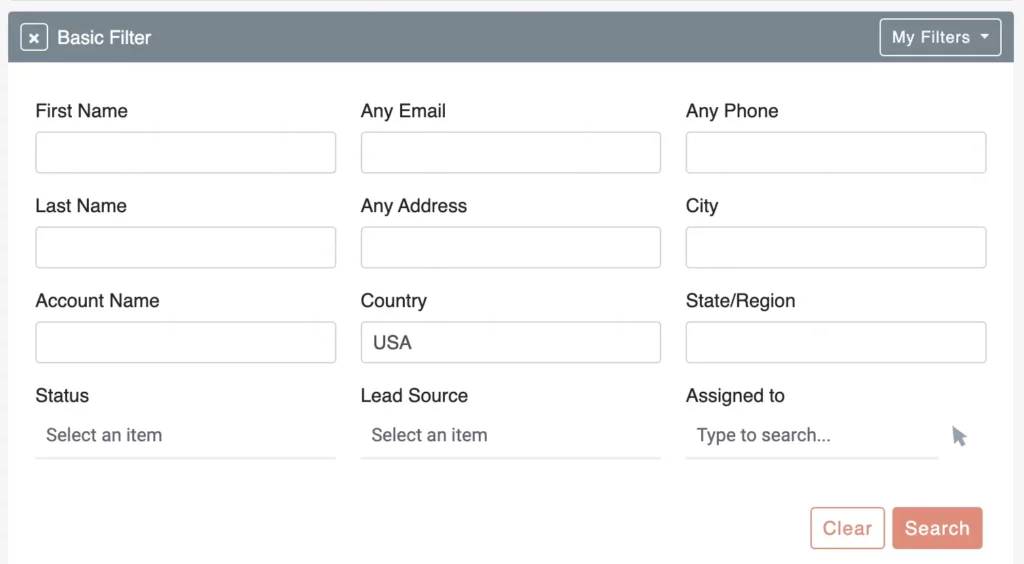
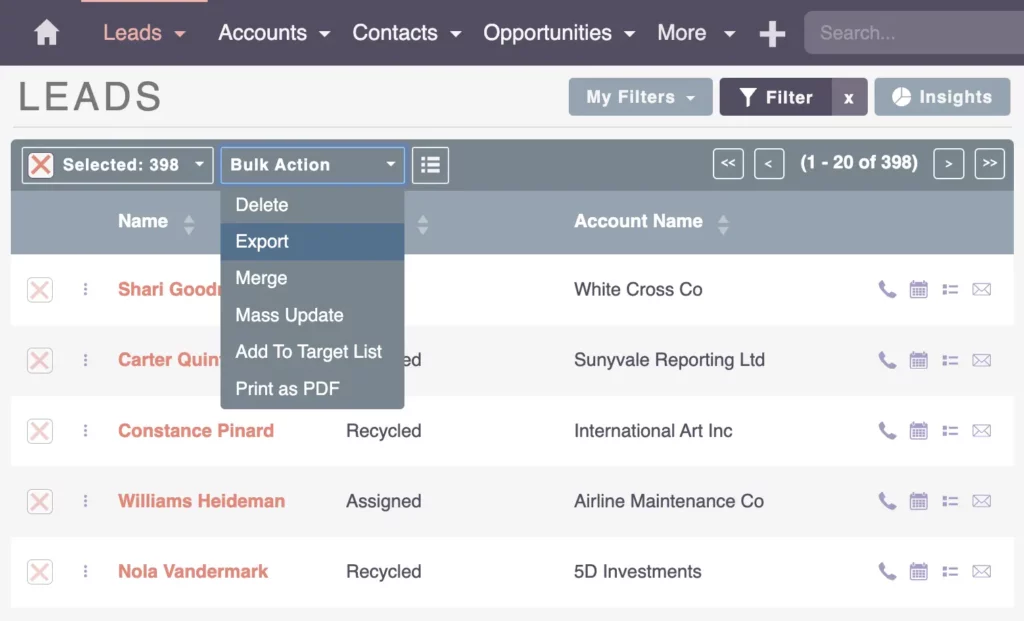
We must handle CSV files with care to prevent accidental data loss. Then, we import the CSV file into a spreadsheet program like Microsoft Excel or in my case, I’m using LibreOffice.
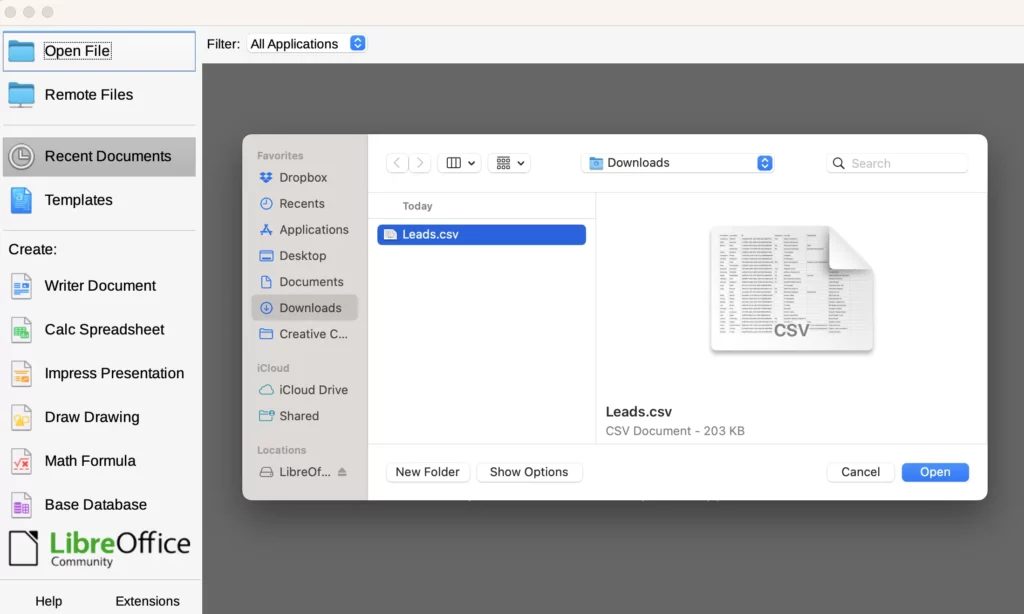
Review Data for Accuracy and Consistency
Making sure your data is accurate and consistent is important for everything to work well. Here, we’ll talk about why checking your data is so important and share some tips to keep your data safe and reliable.
Check Column Type
When importing CSV files, ensure numeric values like postal codes are treated as text to prevent data manipulation. Specify the column type as “text” for fields like postal codes, especially if they contain leading zeros, to avoid formatting issues.
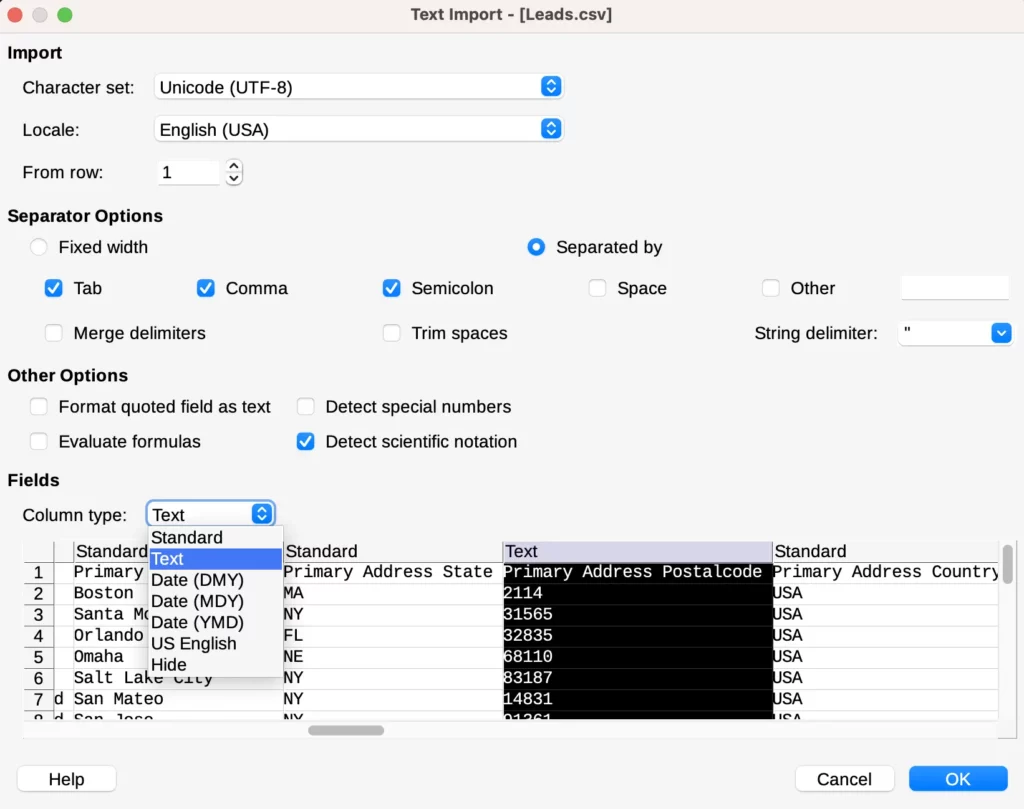
After importing, we find and fix any wrong country names. By maintaining consistency and accuracy in our data, we make sure our CRM system stays reliable for future use.
Remove Unnecessary Columns
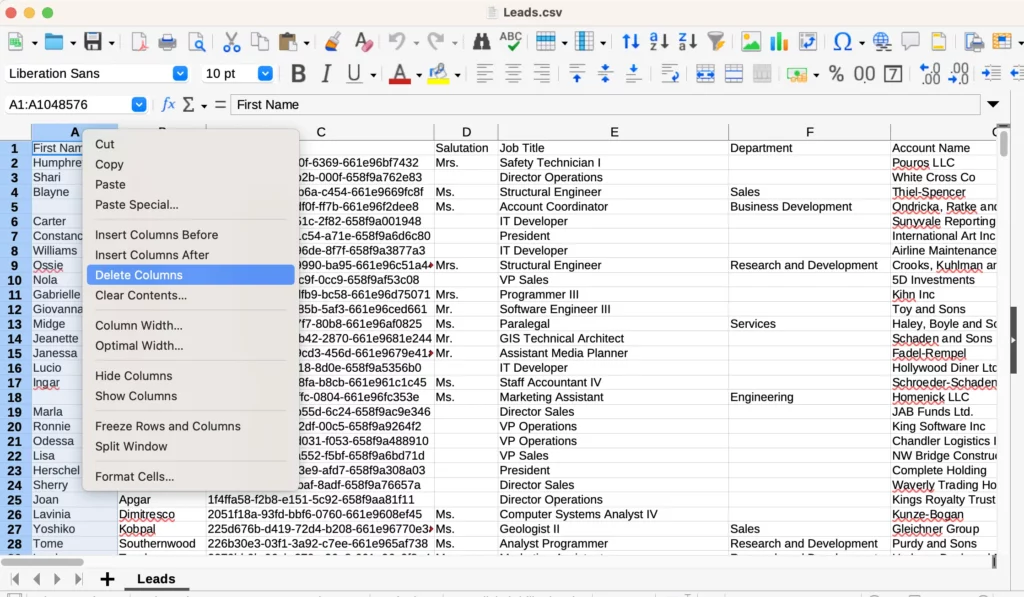
In this scenario, we’ll focus on correcting country names in the imported data. To begin, we select the relevant columns needed for correction, such as Last Name and unique identifiers like IDs.
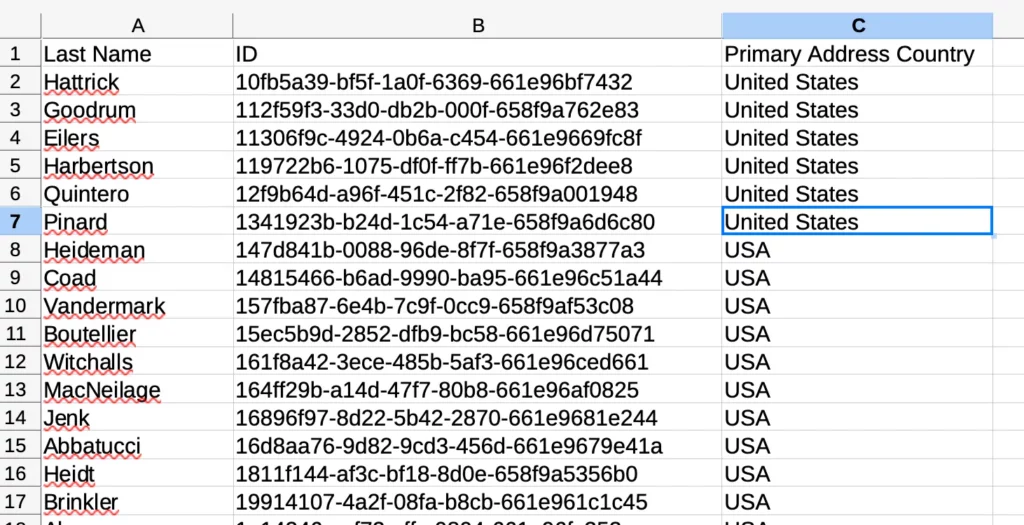
Removing unnecessary columns reduces the risk of unintentional overwrites and maintains data integrity.
Watch Out for Spaces
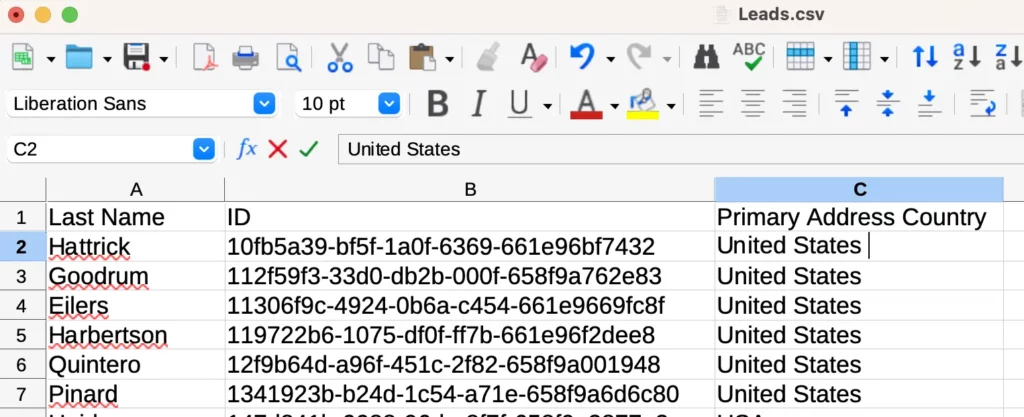
When importing data, pay close attention to details like spaces, as they can impact the accuracy of your records. A space before or after a country name can lead to errors, so review data meticulously before proceeding with the import process.
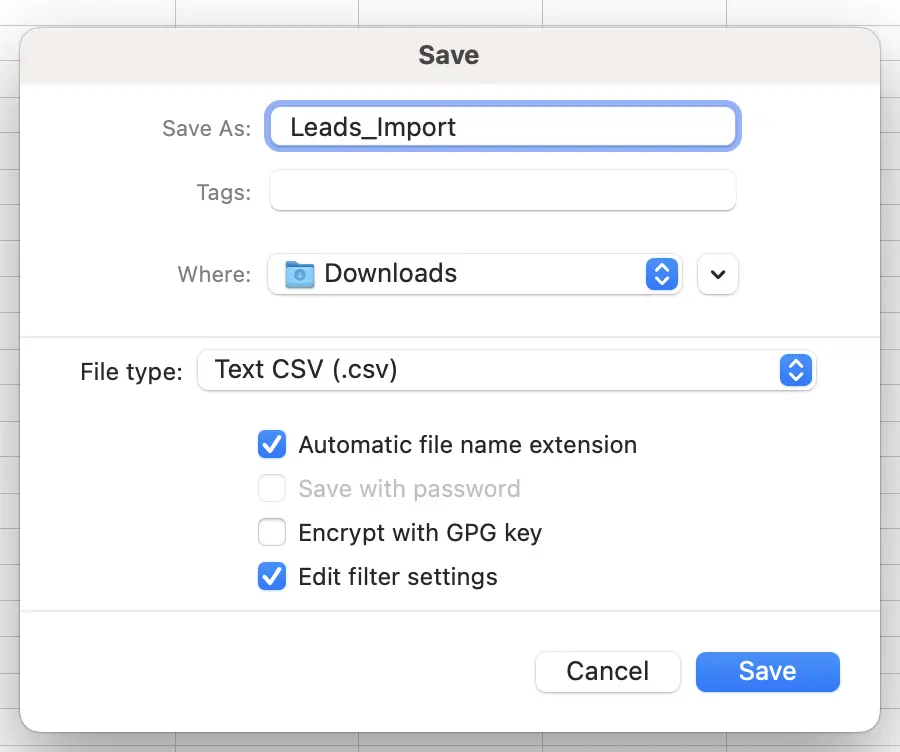
Naming the Import File
After creating your data file, consider naming it in a way that distinguishes it from the source file to prevent accidental overwriting.
For example, name the file “Leads_Import.csv” to differentiate it from the source file.
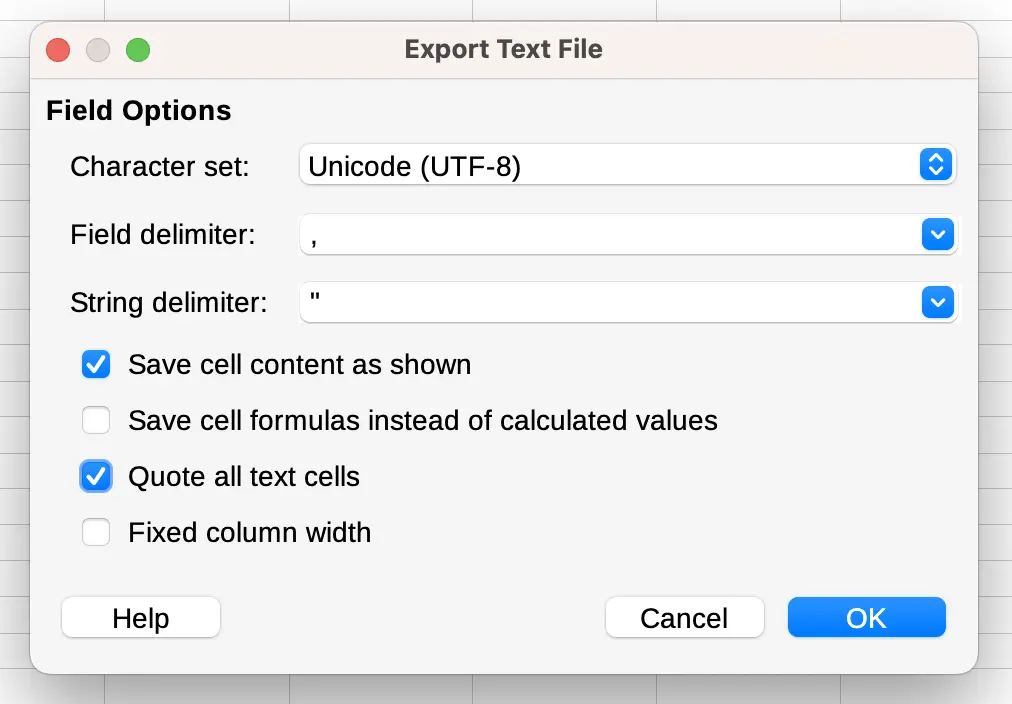
Examine Data Using an Editor
You can use software like LibreOffice Calc to manage filter settings and special characters effectively. Make sure to inspect the data directly to see if it aligns with your expectations and requirements.

I like to open the file with a text editor like Notepad++ on Windows or Geany on Linux to see the contents, bypassing any Excel formatting or interpretation. Upon inspection, I observed the header and confirmed that it contains three columns, each enclosed within quotation marks. This pattern repeats consistently throughout the rest of the records, indicating that the data is structured correctly.
Looking at the raw file helps identify any discrepancies or formatting issues. Overall, the data seems well-organized and ready for further analysis or manipulation.
Create Test Import Files
For large imports, conducting a test import with a small subset of data can help identify and address any potential issues upfront. This approach allows you to validate the import process without risking errors on a larger scale. In case of any discrepancies or errors, consider reverting to a previous state to maintain data integrity within your CRM system.
To do this, duplicate the original import file and create separate test files labeled:
- “Leads_Import00.csv” for the first import
- “Leads_Import01.csv” for the second import
Next, open the test file and retain only one row for the trial import. This allows you to test the import process without affecting the entire dataset.

During the test import, you have two options: you can either revert any changes made during the trial import back to their original state or simply delete the first test data row from the second import file. This ensures that you maintain control over the test data without the need for a complete reimport.

Once the import settings are confirmed and columns are accurately mapped, we can now proceed with the import process.

How can you ensure your data is accurate and error-free? Take a close look at your data and keep it in check to make sure it fits perfectly with your system. Stick to simple but strict data control practices, and you can confidently handle data tasks, free from any errors along the way!
Bastian Hammer
Importing Data into SuiteCRM
Now that we’re back in SuiteCRM with our leads, let’s dive into importing our test lead. But before we jump in, let’s double-check our existing data to ensure accuracy. We’ll start by searching for “Humphrey Hattrick” and confirming the record details, including the ID number.
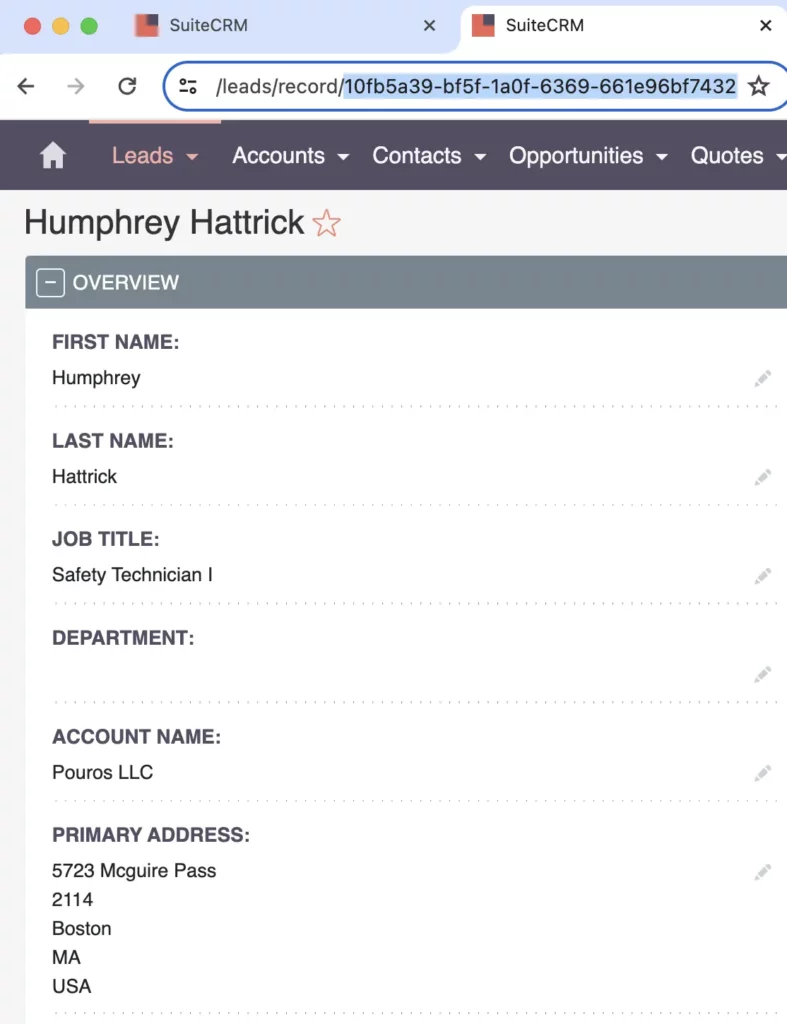

Verifying the ID number ensures we’re updating the correct record. Once confirmed, we can proceed with importing the data. Our goal is to rectify any inaccuracies, like changing the country name from “USA” to “United States.” Let’s proceed with the import process to make these changes and improve data accuracy.
Step 1: Upload Import File
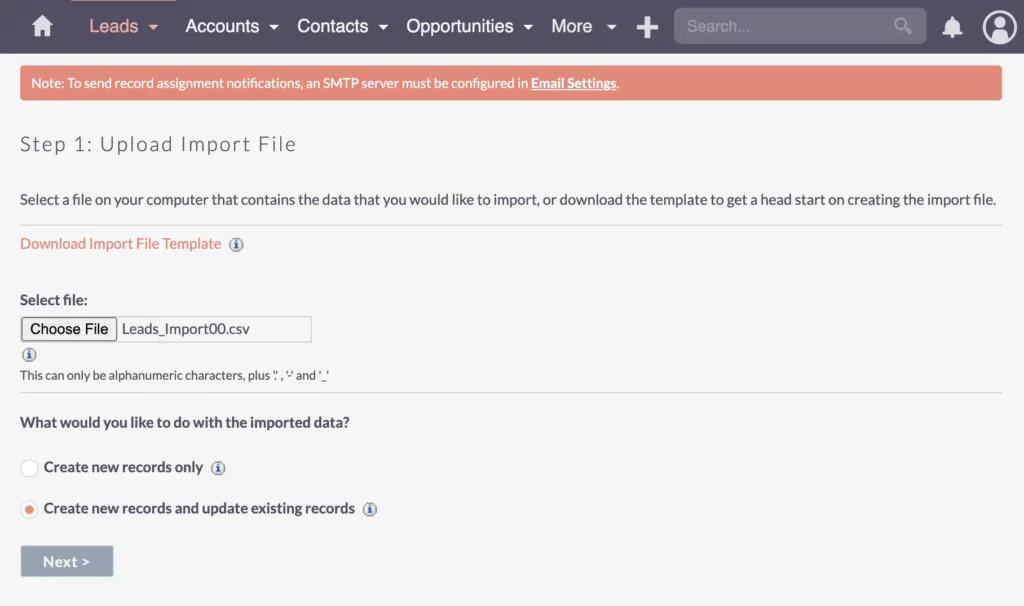
To begin, we’ll select the option to import our leads and select the file containing our data corrections.
After selecting the import option, we’re presented with various choices, such as creating new records or updating existing ones.
Step 2: Confirm Input File
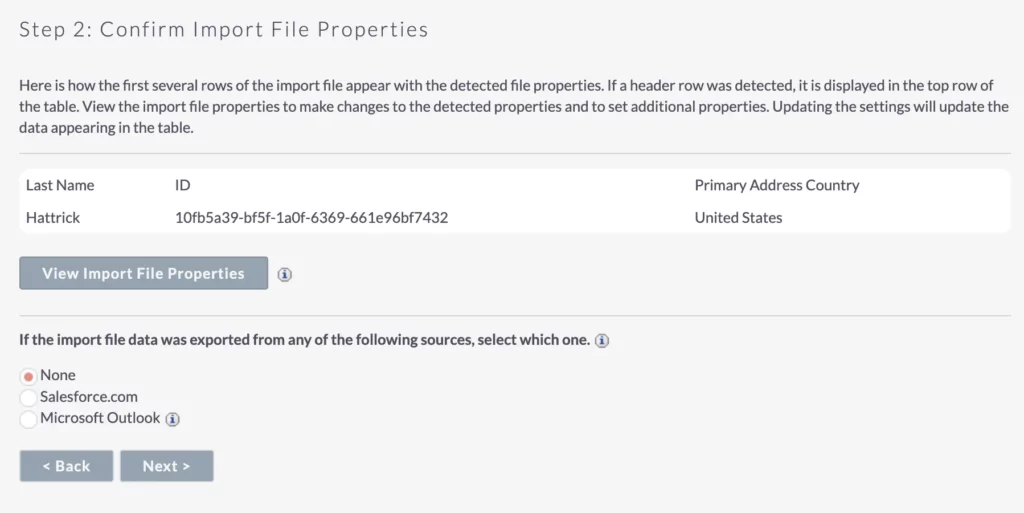
It’s essential to carefully review the preview of the import file to ensure it matches our expectations. If needed, we can make adjustments to the file format for compatibility.
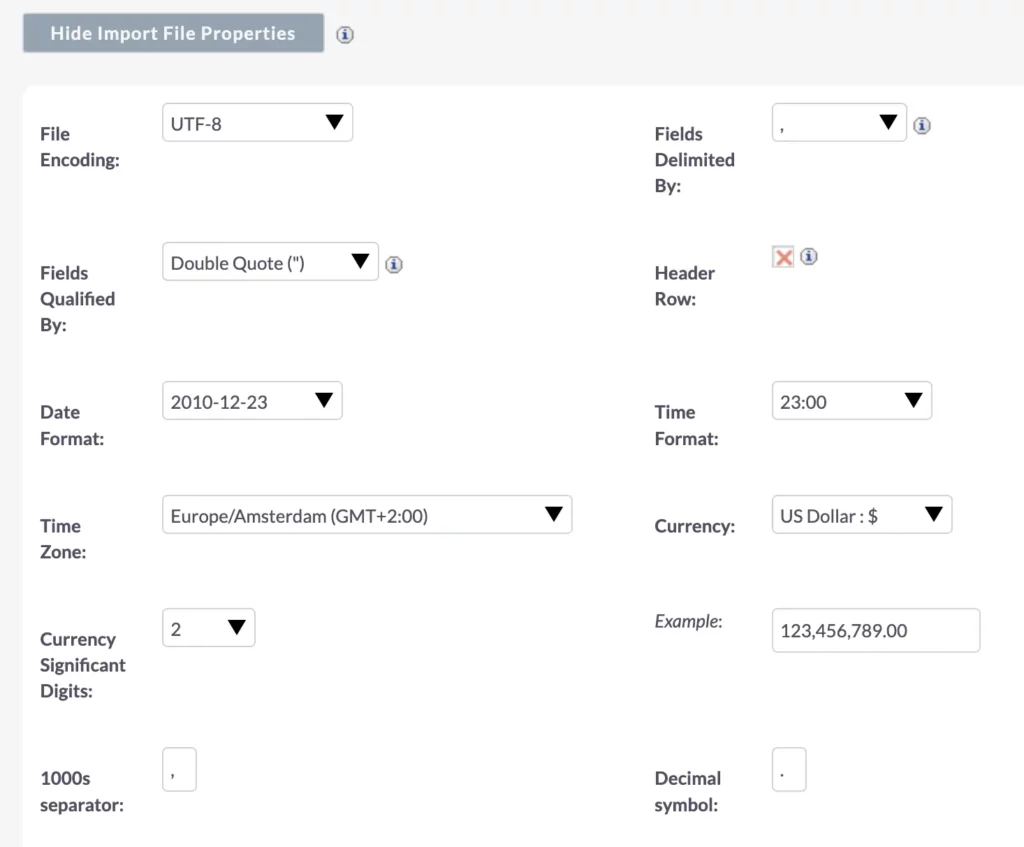
Check the Import File Properties to ensure that the data structure aligns with what we expect. If everything looks good, we’re halfway there. But if there are discrepancies, we can use Excel or LibreOffice Calc to make adjustments and ensure the CSV file is just right.
Examine the CSV file you exported to see if it matches what you need. Usually, you’ll see elements like the header row and field delimiter, often a comma. While this might seem easy, sometimes you might need to do more checking, especially if you’re importing from platforms like Salesforce or Outlook. For those, you’ll even find that you’ve got preconfigured profiles available. Even if you skip these profiles, make sure you map things right to avoid errors in data interpretation.
Step 3: Confirm Field Mappings
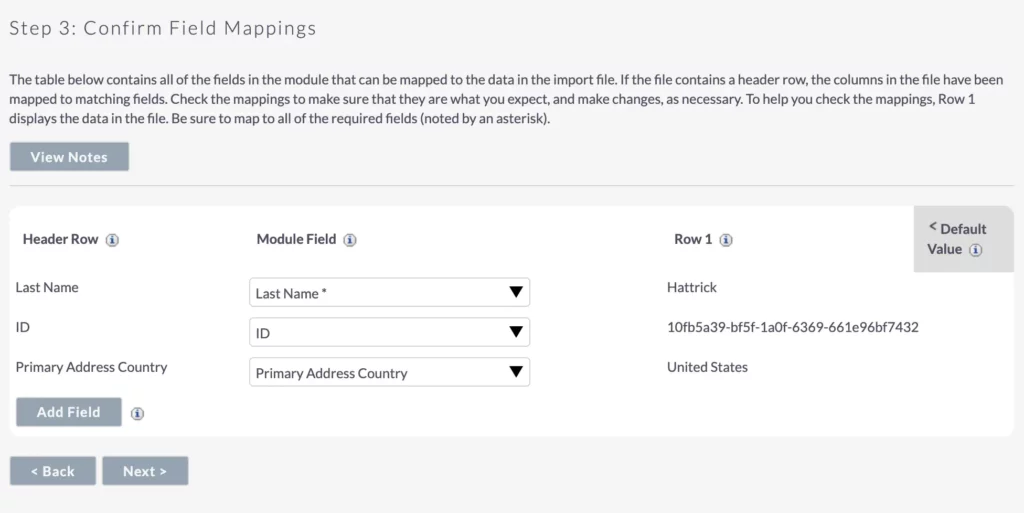
Mapping is a critical step in the import process, where we specify how each column in our file corresponds to the SuiteCRM system’s database. Once mapping is done, we can move forward with the import, keeping an eye out for any potential duplicates and saving our import settings for future use.
Step 4: Check For Possible Duplicates
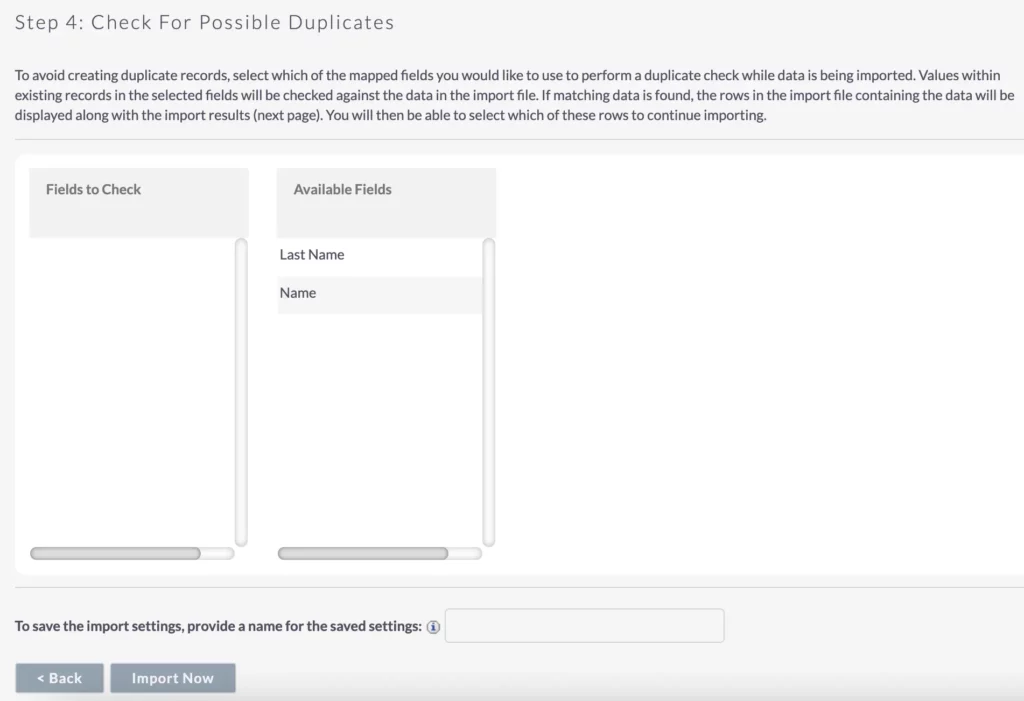
Currently, we’re not set up for duplicate checks, but we’ll cover that in another video.
You can save your import settings, especially if you’ve customized them for specific data sources, as was the case in one of my projects. In that project, we had to configure multiple import profiles for various data sources.
After ensuring all settings are in place, it’s time to hit the import button. This final step completes the data transfer process, ensuring that the information is seamlessly integrated into the system.
Validating Data After Import
As we import data, we pay close attention to any warnings or errors, making adjustments as needed. Once the import is done, it’s time to check if the corrections worked.
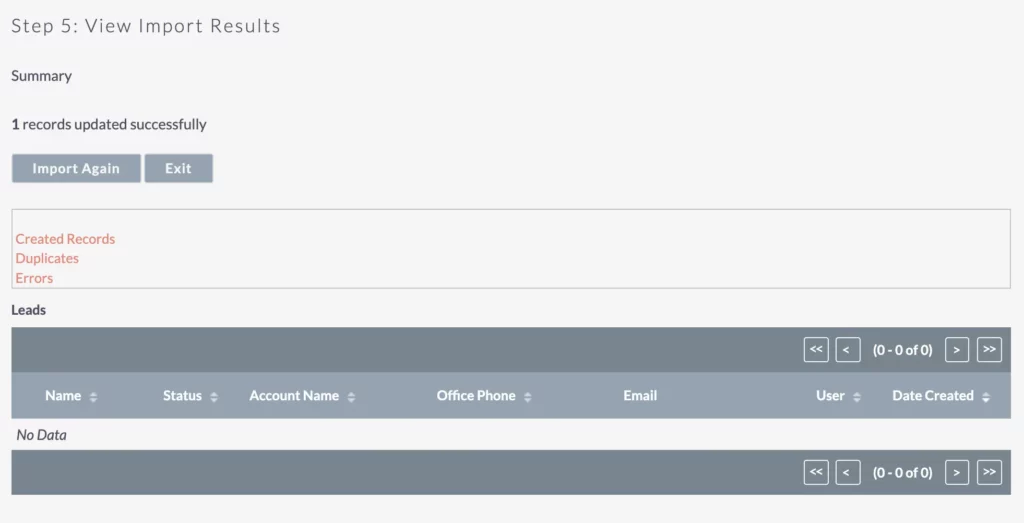
After hitting the import button, the system starts bringing in the data. Ideally, you’ll see one record successfully updated and no errors or duplicates. That means the import went smoothly.
In this example, the country has been corrected from “USA” to “United States”.
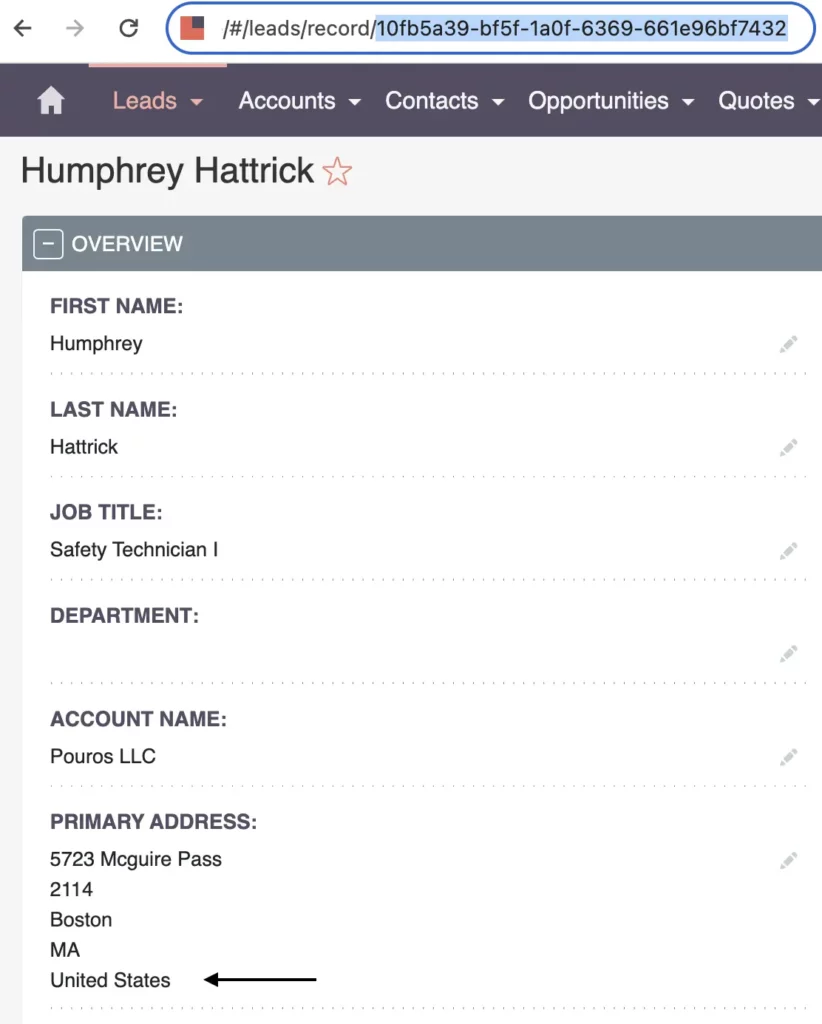
Now that the data is accurate, you can generate reports and analyze numbers effectively. Following these steps helps us keep our data in good shape and makes our CRM system work even better.
Database
Case 4: Update Multiple Records – Database
Let’s move on to the next topic, which gets a bit more technical. Here, we’ll explore the database itself, and it’s crucial to proceed with caution. While simple selects typically don’t cause issues, updates can potentially cause trouble if not handled carefully.
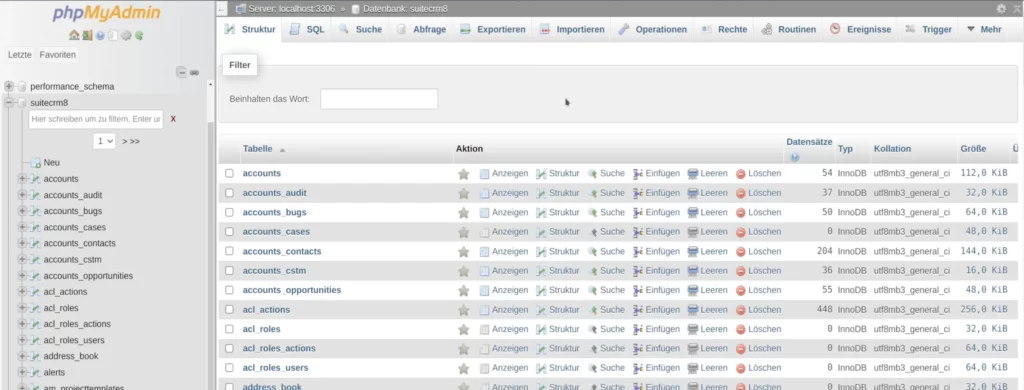
Create Backups Before Updates
If you’re making updates and you’re unsure whether it’s a minor change or if you’re not entirely confident in what you’re doing, it’s always a good idea to take backups first. It’s important to err on the side of caution and back up your data before proceeding with any updates.

Always Back Up Before Updates!
By backing up your data before making updates, you reduce the risk of accidentally causing significant damage to your database. Remember, it’s better to be safe than sorry when it comes to effectively managing your database and preventing any potential data loss or corruption.
Bastian Hammer
Analyzing Data Issues
Addressing data discrepancies is crucial for maintaining the integrity of any CRM system. Recently, we came across a minor issue in the leads table of SuiteCRM, specifically related to the website field.


Navigating through the SuiteCRM interface, we pinpointed the affected leads and identified the necessary changes to be made.
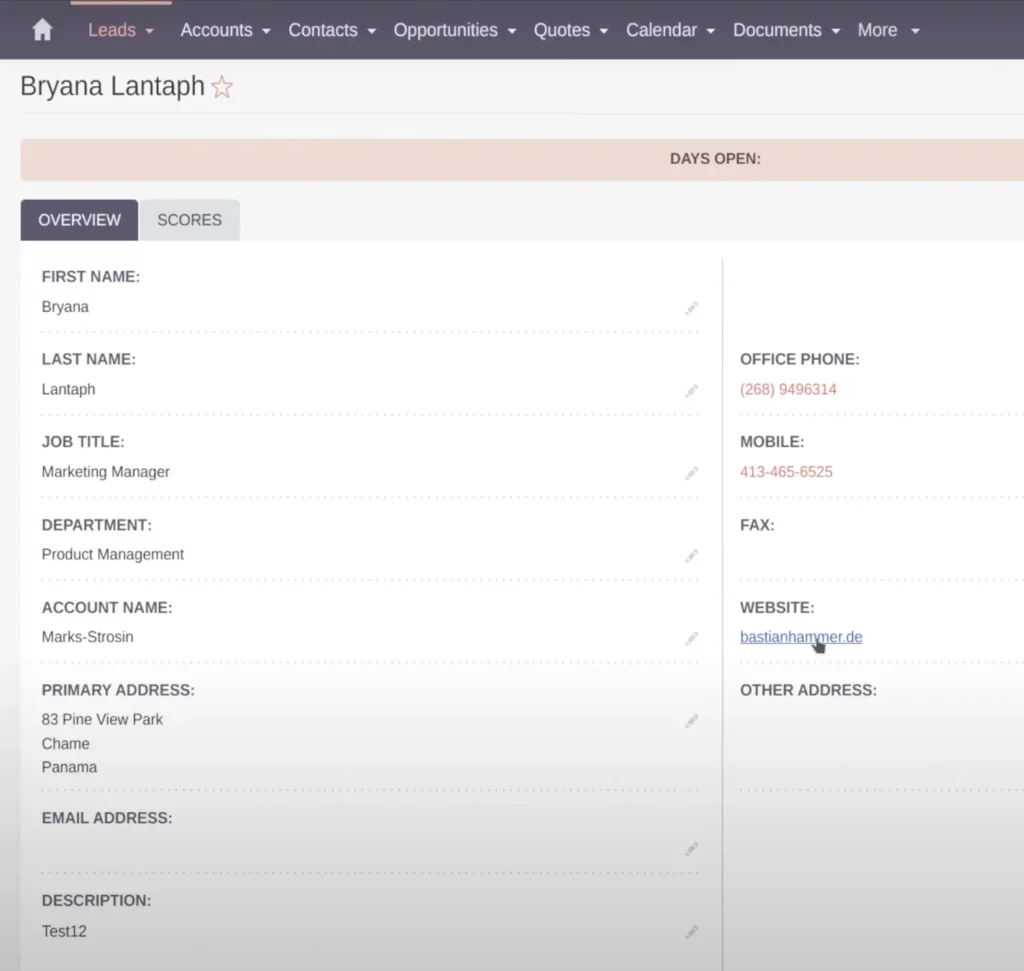
Upon closer inspection, you notice that the website URLs can be missing a protocol, rendering them inactive. To resolve this issue, you need to prepend the missing protocol to the URLs.
SQL Command Prompts
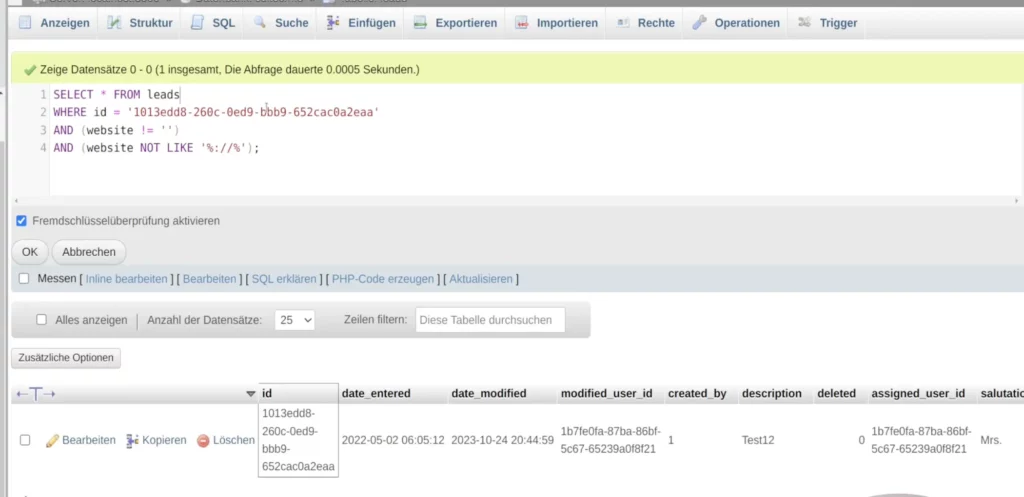
SELECT * FROM `leads`

This line selects all columns (*) from the "leads" table in the database. It retrieves all information stored in Leads.
WHERE id = '[insert ID number here]'

This part filters the results to only include the lead with a specific ID number. You need to replace [insert ID number here] with the actual ID number you want to retrieve. In order to start careful and small, you can focus on one ID first.
AND (website != '')
This line adds another condition to the query. It ensures that the "website" field for the selected lead is not an empty string. In SQL, != means "not equal to". So, it's excluding leads where the website field is empty.AND (website NOT LIKE '%://%');
This condition further refines the query. It ensures that the "website" field does not contain any string that includes ://. The % symbol is a wildcard in SQL, so %://% means any string that contains ://. The NOT LIKE operator ensures that leads with a website containing :// are excluded.As you can see, it correctly found this particular lead, and everything turned out well. This gives us confidence that if such action is taken or updated in the future, it should work for all (not only the ID you’ve entered to start with).
Executing Database Updates via MySQL DB
To update the database effectively, we’ve crafted SQL queries to selectively target and modify the affected records. By adding the correct protocol to the website URLs, we’ve ensured their functionality and visual appeal.
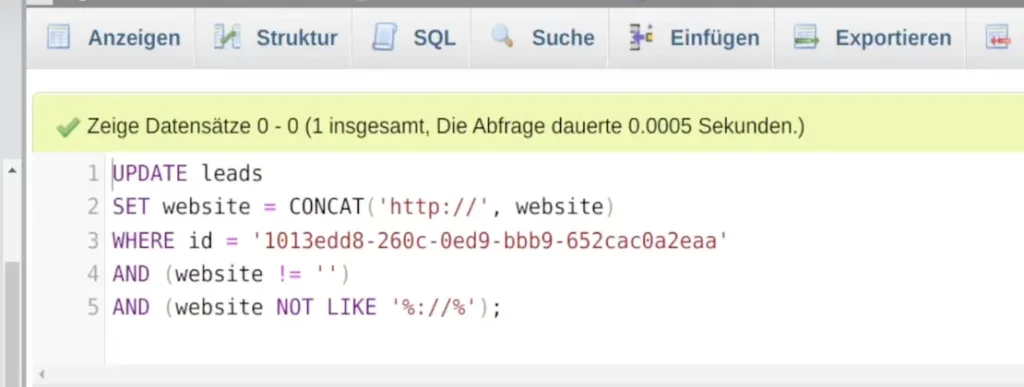
Now that the select function is working correctly and has pinpointed the specific record, the update process should proceed smoothly. To initiate the update, simply use the following command:
UPDATE leads
SET website = CONCAT('http://', website)
WHERE id = '1013edd8-260c-Oed9-bbb9-652cac0a2eaa'
AND (website != '')
AND (website NOT LIKE '%://%');
After verifying the changes, proceed to remove the select function. Upon doing so, confirm that the leads have been updated with the new website information. Next, double-check the updates to ensure everything is in order before running the entire process.

Once the process is completed, refresh the page to view the updated version. You’ll now notice the HTTP protocol added to the website links. This signifies that the changes have been successfully applied, and the website will now redirect users to the correct page.
Advantages and Disadvantages of Editing Data in SuiteCRM via Database
There are both advantages and disadvantages to performing actions directly via the database. When you do this, certain features, like automated workflows or timeline updates, may not be triggered. This is because the system doesn’t recognize the changes made directly at the database level.
However, using SQL statements directly on the database allows for greater flexibility and customization. You can execute complex operations tailored to your specific needs. If you choose this route, ensure you understand what you’re doing, test it on small datasets, and proceed cautiously.
While it’s generally recommended to avoid direct database manipulation, there are instances where it’s necessary. For large-scale data updates, working directly with the database might be the most efficient approach. Just be mindful of potential risks and proceed carefully to maintain data integrity.
Recap
Summary of Data Editing Data in SuiteCRM
Let’s quickly review the methods we’ve explored for editing data in your SuiteCRM system. Firstly, there’s the standard approach of opening individual records, making changes, and saving them. This method is reliable but may not be efficient for large-scale updates.
Next, we discussed the mass update feature, which allows you to modify multiple records at once, particularly useful when working with simpler changes. If your data tasks are more complex or you prefer using Excel, exporting data, making changes, and importing it back into SuiteCRM is an option.
Lastly, as a final option for significant data updates, like managing large volumes of records, you can directly access the database. However, this method requires caution and expertise to ensure data integrity and avoid errors.
And with that, we’ve come to the end of our discussion for today. Stay tuned for more insightful articles and updates. Thanks for reading, and until next time, take care!