Automate Your Business with SuiteCRM Scheduled Workflows: A Complete Guide
Streamline your business processes with SuiteCRM Scheduled Workflows. In this guide, I’ll show you how to automate repetitive tasks. The scheduled workflows run in the background and will automate processes for you. Follow this step-by-step guide to set up and customize workflows that fit your unique needs, and unlock new levels of productivity and efficiency.
Navigating the fast-paced digital world can be overwhelming. But what if I told you there’s a way to simplify your workflows and maximize productivity? In this guide, I’ll show you how SuiteCRM Scheduled Workflows can revolutionize your efficiency.
One use case for scheduled workflows are KPIs and calculations in the background. Therefore, it’s time to dive deeper into your KPIs to understand how well your processes are performing. Identifying any outliers and monitoring performance is crucial. This way, you can see what’s working and how efficiently things are moving along.
We’ll do this by using scheduled workflows. They run in the background and automate processes for you, handling repetitive tasks and setting triggers for important events. This allows you to focus on high-leverage activities that drive real results.
I’ll walk you through the process of setting up your own scheduled workflows in SuiteCRM, from the basics to advanced customization. And if you prefer a visual walkthrough, you can also check out this helpful video tutorial for step-by-step instructions.
Don’t worry if you’re not tech-savvy – I’ll break it down into easy-to-follow steps, so you can get started right away. Let’s dive in and discover the incredible benefits of scheduled workflows for yourself!
Defining the Workflow
Step 1: Defining the Workflow
Let’s take a closer look at the SuiteCRM system and explore how we can analyze its performance. Focusing on key performance indicators (KPIs) and use scheduled reports to track them.
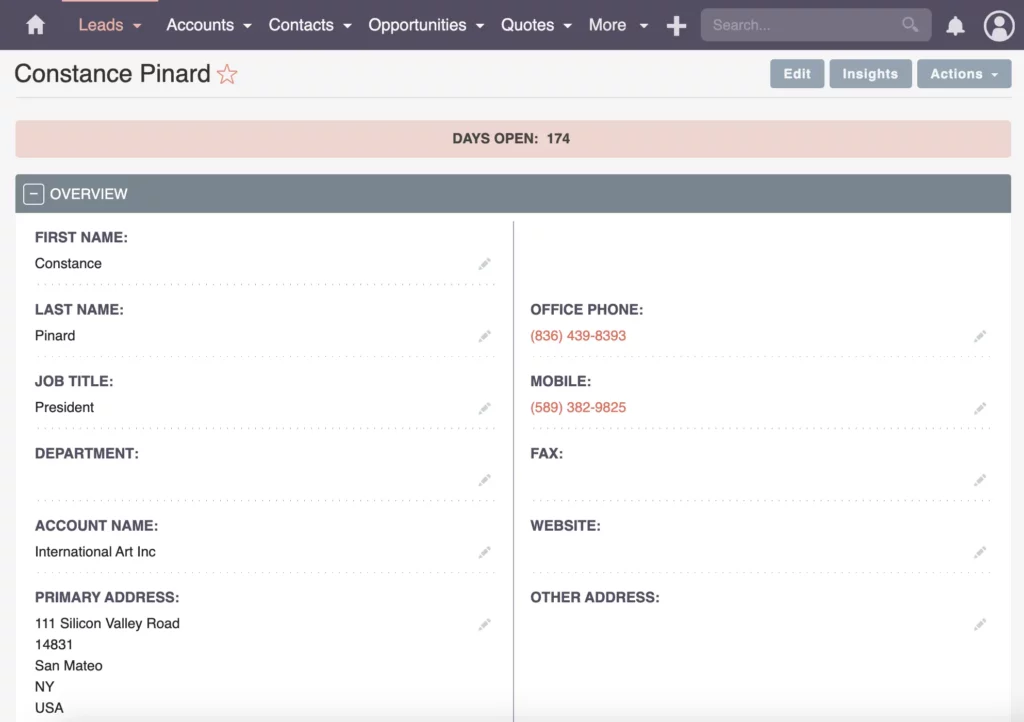
For example, let’s say we’re interested in metrics like Days Open for leads. Drawing from my experience in past projects, I know firsthand how crucial this data can be for our team meetings and forecasting. To customize further, we can easily add additional fields through the Admin panel and then Studio.
If you’re interested in diving deeper into fields and data modeling, I’ve got you covered with a comprehensive video on SuiteCRM Fields.
Plus, you might want to check out my course on data modeling for a more in-depth understanding of the fundamentals of your data structure within the CRM system.
Let’s optimize your SuiteCRM system to match your past successes and current needs.
Checking the Data
Step 2: Checking the Data
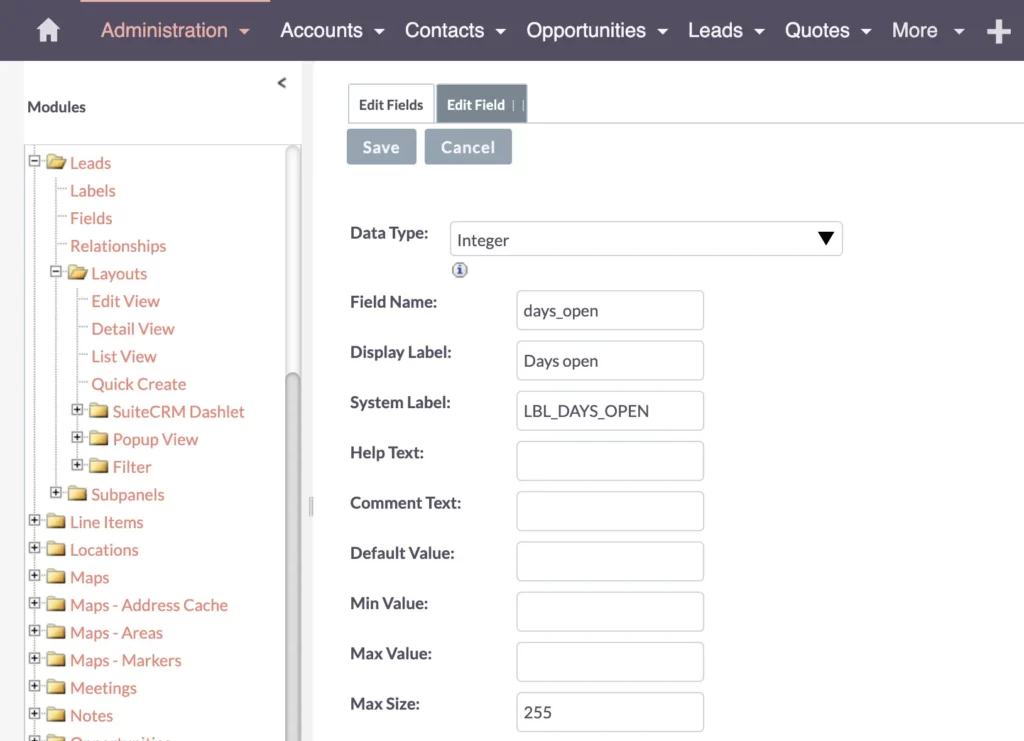
Let’s shift our focus to the Leads module, where we need to add some fields. Specifically, we’re adding an integer field called “Days open.”
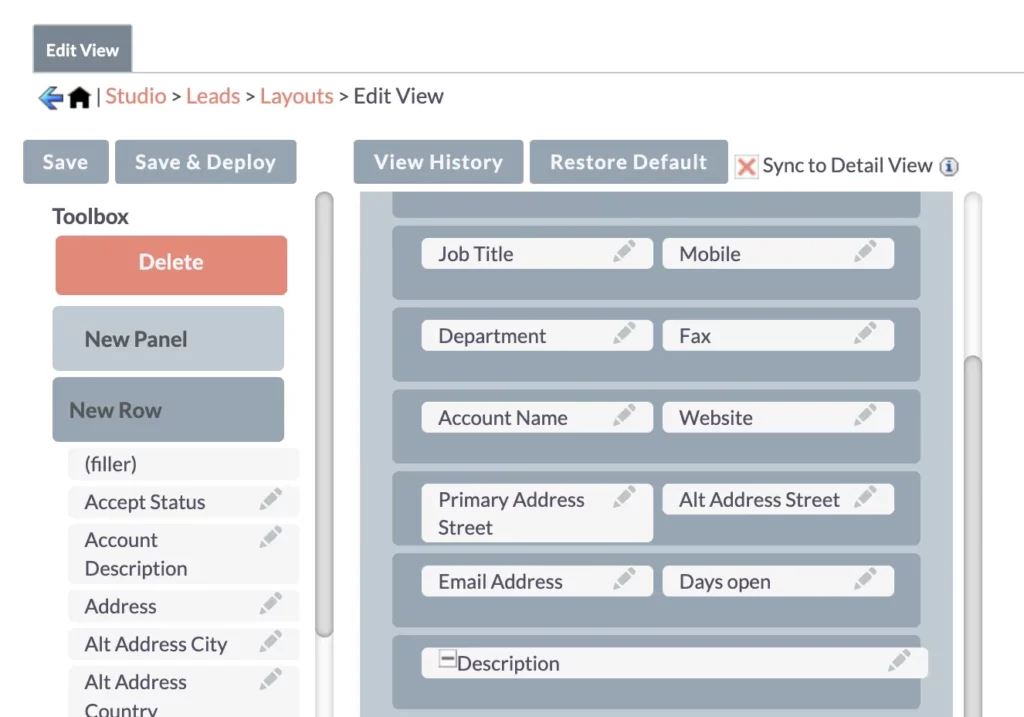
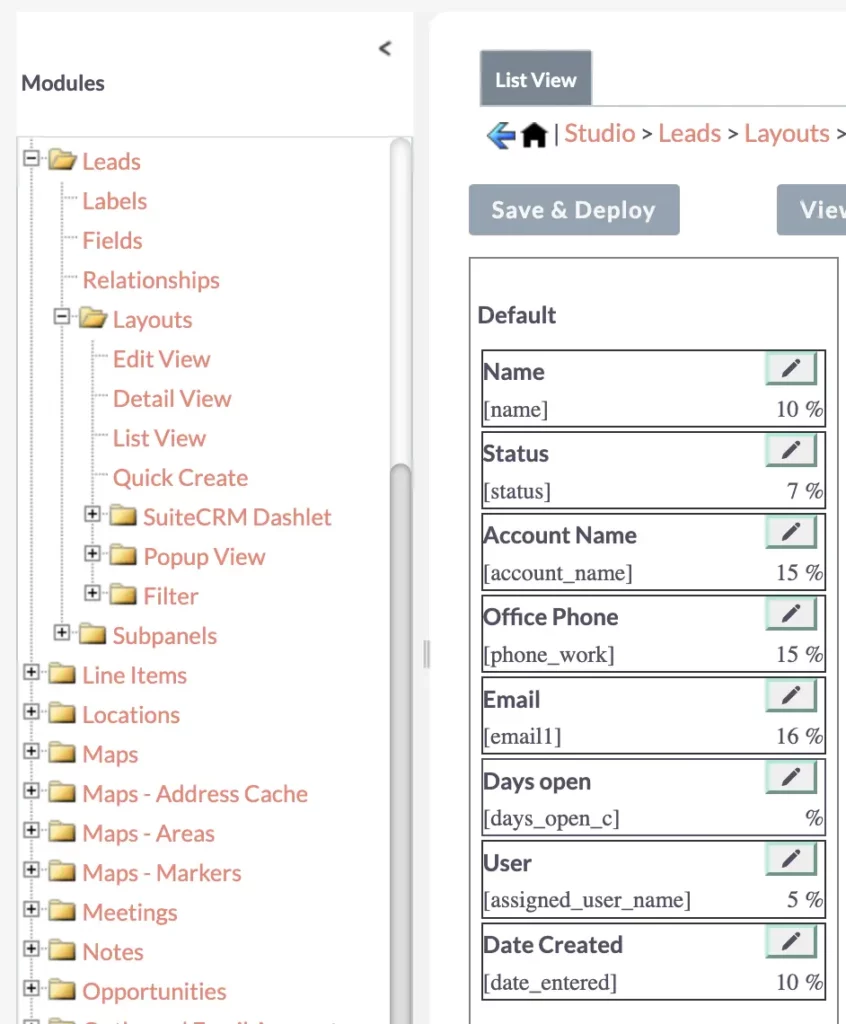
Now that we’ve set up these fields in the leads module, it’s time to make sure everything’s running smoothly. By thoroughly reviewing the layouts and list views, we can ensure that the new field we’ve added integrates smoothly into our workflow.
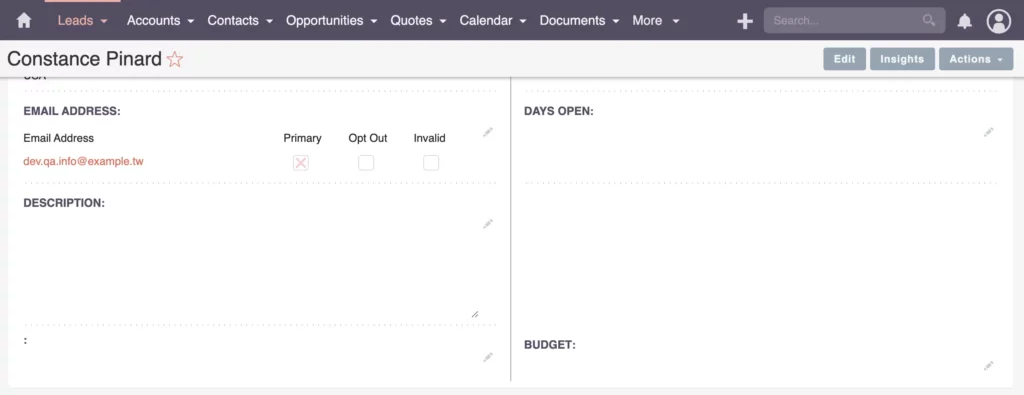
Upon checking, “Days open” is visible and functioning correctly in both our edit and detail layout and list view. This step ensures that our data tracking is accurate, laying a solid foundation for effective analysis and decision-making.
Step 3: Implementing the Workflow
Firstly, we need to create some data within the system. Simply head back to the Admin area and access the Workflow Manager.
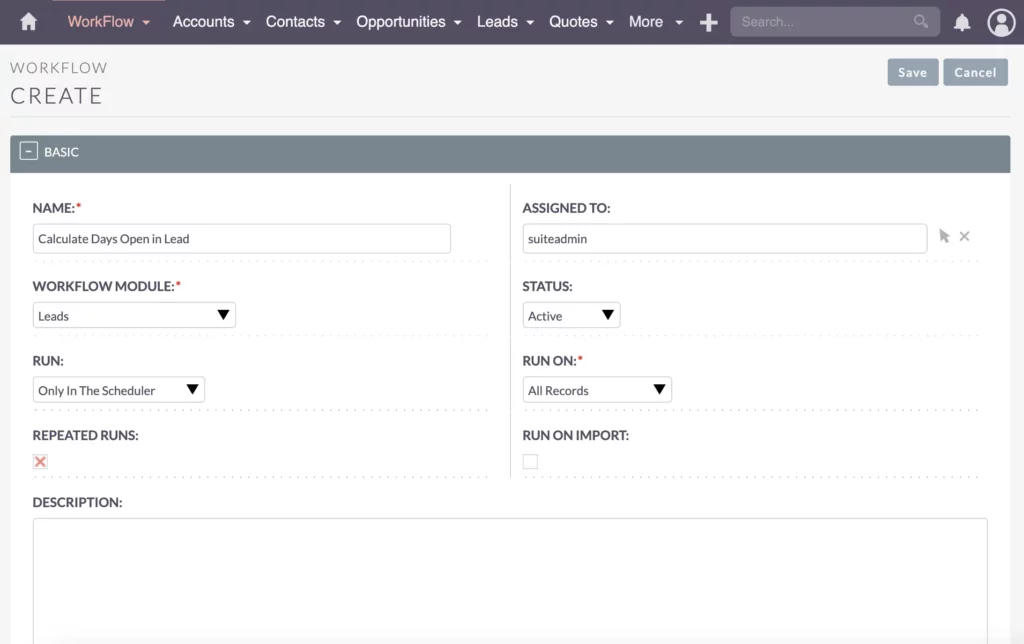
Begin by creating a new scheduled workflow. Name it “Calculate Days Open in Lead.” Since this process centers on leads, make sure to set the workflow module to “Leads.”
Next, specify that the workflow should “Only Run In The Scheduler” and apply to “All Records.” This ensures that the calculation is performed frequently, even if the exact frequency doesn’t matter much at this stage.
Repeated runs are crucial for ongoing updates. We might want this calculation to occur daily rather than at shorter intervals. This ensures that our data is consistently up-to-date and accurate.
Set Up Workflow Conditions
Now, let’s limit the data we’re processing to speed things up.
Suppose we’re focusing on leads coming from the website. In that case, we’ll add a new condition, using Lead Source as the basis. Set the operator to “Equal To” and the Value to “Website.”
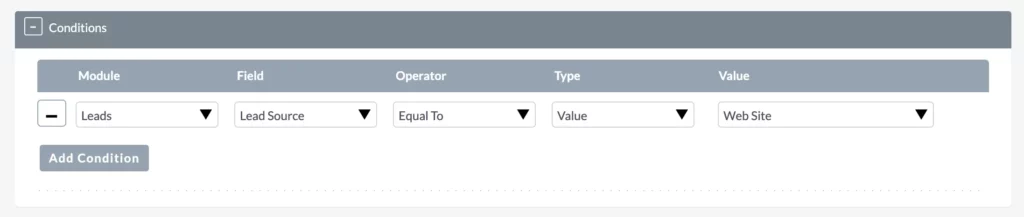
This approach streamlines decision-making, especially when distinguishing between qualified and non-qualified leads.
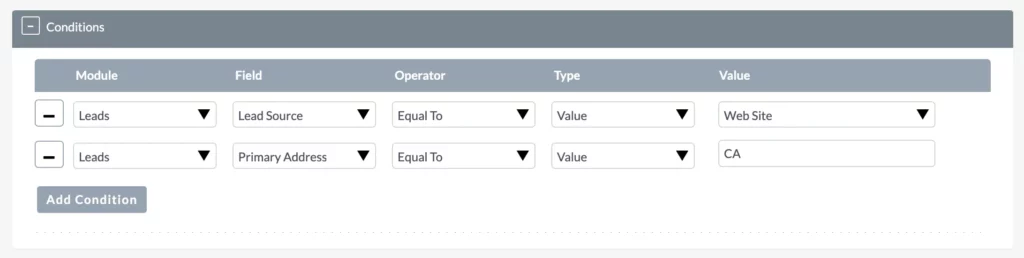
Next up, let’s set up the Primary Address State. For instance, we can set it to “CA.” While this example is for demonstration purposes, keep in mind that you can customize it according to specific needs.
More common filters would be: All leads, which are not converted, yet. If you have added a field about the lead stage (qualified, marketing qualified, sales qualified) that could be a good candidate to filter as well.
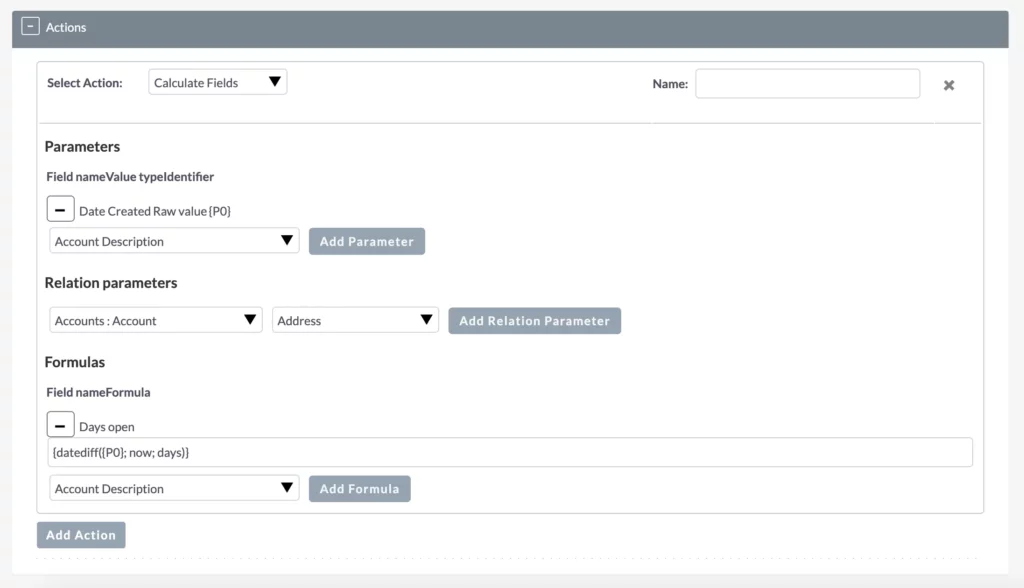
Set Up Actions: Calculated Fields
Our next step here is to utilize calculated fields effectively. If you want to learn more about how they work, I’ve gone into detail about SuiteCRM Calculated Fields in another video. Check it out for a deeper understanding of this feature.
Now, let’s set up a “Date Created” parameter. We’ll also add a formula, with “Days Open” as the receiving field. To calculate this, we’ll use a specific formula called datediff, which requires three parameters: the record’s parameter, the current timestamp, and the unit (in this case, days).
After configuring the parameters, we save the changes and wait for the process to run. The frequency of this process depends on your server environment. While Linux CronJobs typically run every minute, your server settings may differ, requiring adjustments or external services.
Once everything is set up, your SuiteCRM system should be fully operational. This ensures that both the CRM system and server are correctly configured for optimal performance and functionality.
Test and Deploy
Step 4: Test and Deploy the Workflow
Let’s refresh the page to see the latest updates.
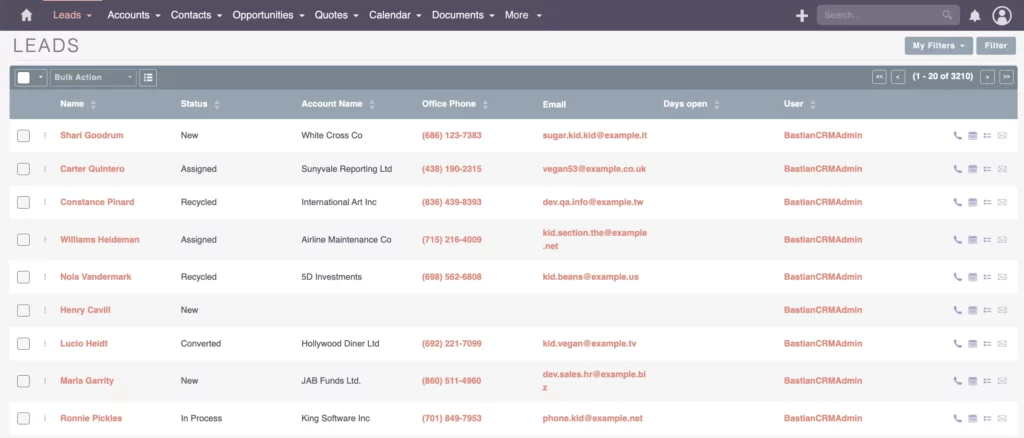
Then, head to the Leads section and filter for website leads from California. Upon searching, it looks like everything is running smoothly, with the “Days Open” field being calculated accurately.
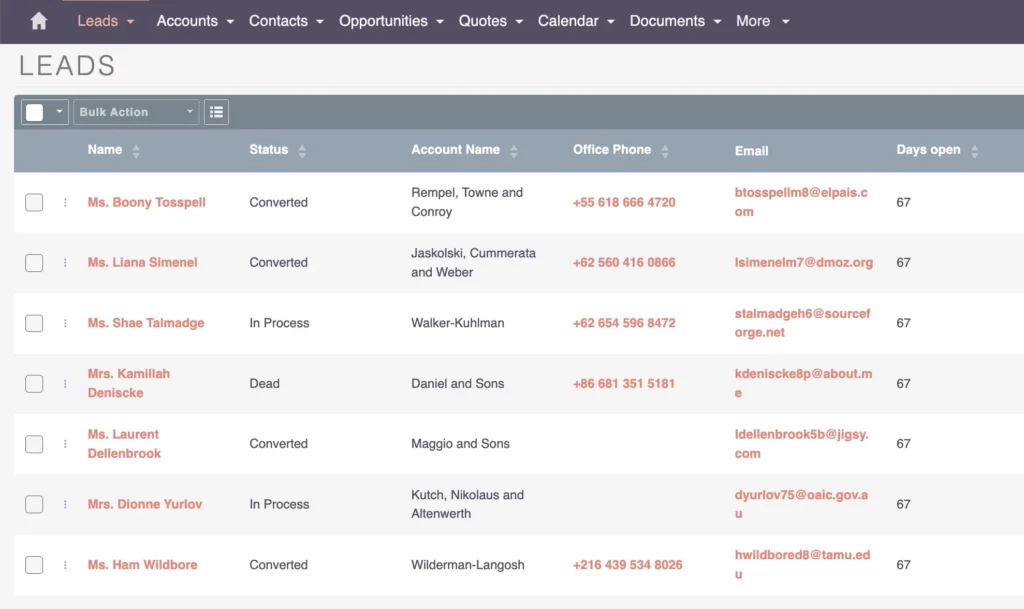
However, there are leads that have been open for quite some time, which isn’t ideal. It’s crucial to focus on converting these leads faster.
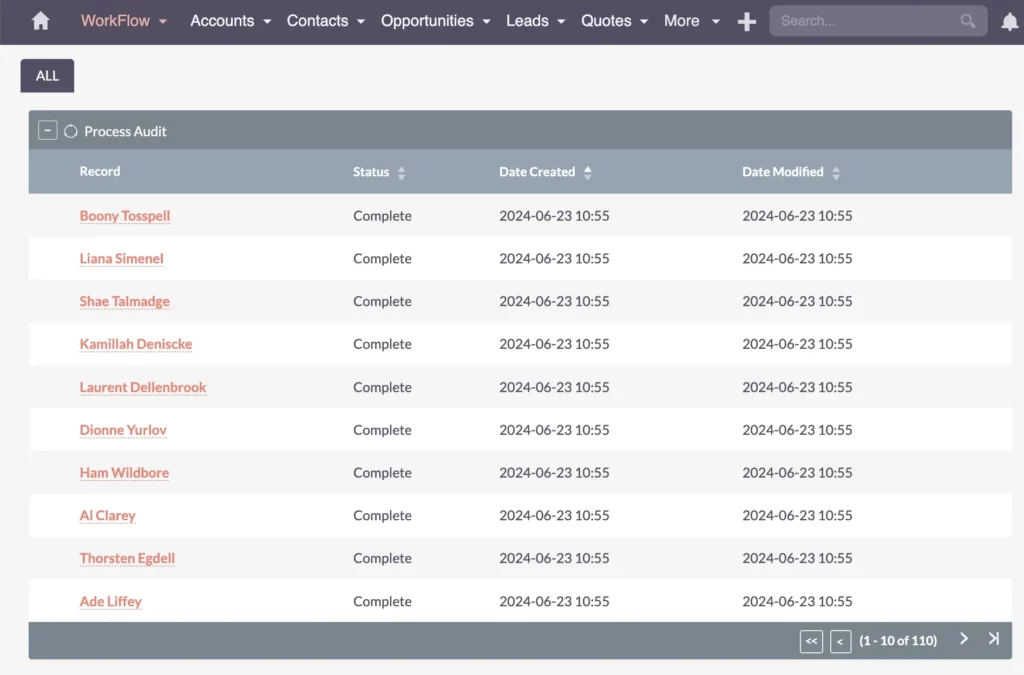
Now, returning to the workflow, you’ll notice in the sub-panel ‘Process Audit’ it’s actively calculating data. The workflow will calculate the values as frequently as possible. Each night, you’ll see the new values automatically updated, incremented by one because it’s the next day.

Did you know? Scheduled workflows like these are invaluable for managing numerous leads or records efficiently. They’re commonly used for automating processes, allowing you to handle and analyze data more effectively.
Bastian Hammer
I’ve used scheduled workflows for multiple use cases in projects already, such as:
- Exports into data warehouses
- Sync with other systems
- KPI calculations for bonus overviews on a monthly basis
- Automated follow-ups after x days
- Drip mail campaigns
- etc.
Recap
A Quick Recap on SuiteCRM Scheduled Workflows
Let’s sum things up quickly. Now you have a good understanding of when to use scheduled workflows, based on what makes sense for your business processes. You’ve grasped the concept and seen how it works in action as we built this workflow together.
First, we focused on setting specific conditions and tailoring the logic to suit particular leads rather than all of them. Then, we explored how to calculate key metrics to boost performance, streamline processes, and facilitate reporting and team discussions on crucial topics. These calculated KPIs are pivotal in our day-to-day operations.
Thanks for joining me! Before you go, why not share your thoughts in the comments below? I’d love to hear your feedback.
And remember, this is just one of many insightful articles I have on SuiteCRM. Feel free to explore my other articles for more valuable insights and tips.
That’s all for now, but stay tuned for more exciting content in the future. Take care, and farewell until next time!