SuiteCRM and WordPress Integration – The Quick and Easy Guide to Integrate CRM and Website
Have you ever thought about making your life easier by linking your SuiteCRM with your WordPress site? Here’s a simple guide to SuiteCRM and WordPress Integration.
SuiteCRM and WordPress Integration: A Quick Guide
Hey everyone! Today, I’m going to show you how to connect your WordPress website with SuiteCRM. That way, when someone fills out a form on your WordPress site, it goes straight to your SuiteCRM system.
If you want, you can also check out this quick and easy video guide on SuiteCRM and WordPress Integration.
Integrating SuiteCRM with your WordPress website can streamline your data management process. By automating the transfer of data from contact forms to your CRM system, you can save time and reduce errors. Here’s a step-by-step guide to help you through the process.
Prepare Your WordPress Website
Step 1: Prepare Your WordPress Website
First, make sure you have both your SuiteCRM system and WordPress website up and running. Usually, these two systems don’t communicate directly, so you end up doing manual data entry. Our goal is to get rid of this manual work by integrating them.
Let’s simplify the process into easy steps. First, head to WordPress and create two key pages. One is your Landing Page, where visitors will arrive.

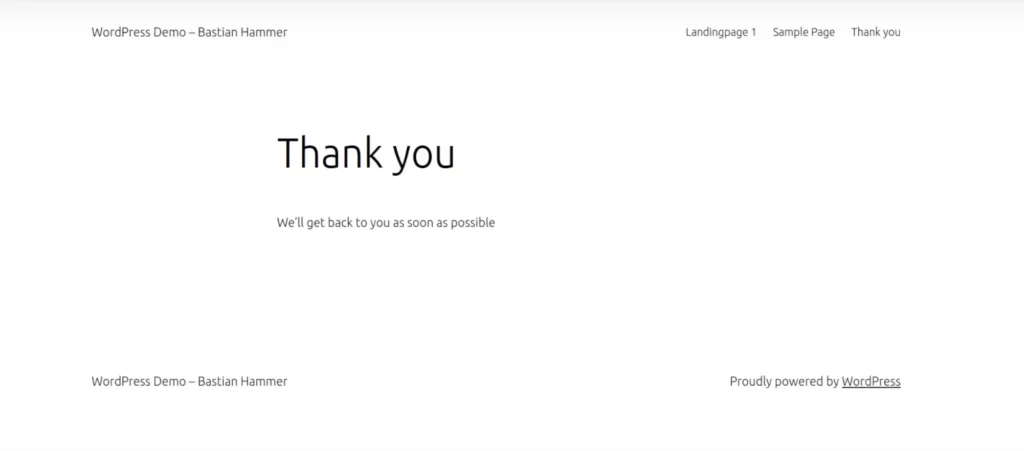
And the other is a simple Thank You Page after they submit forms.
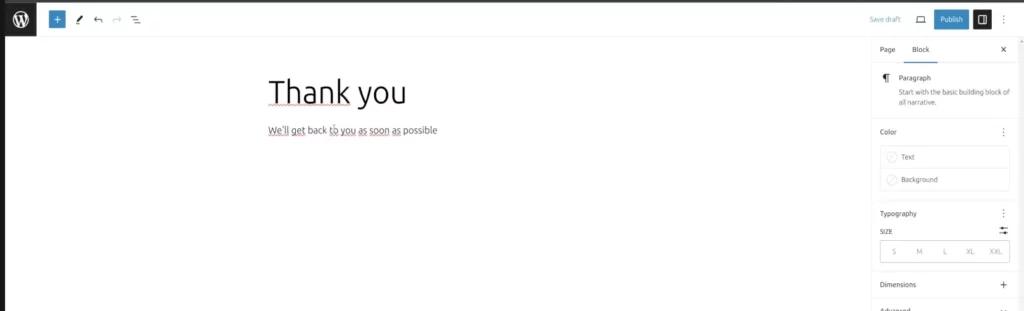
Once those pages are set, make sure they look great and fit smoothly with your website’s style. It’s important for a seamless user experience. Now, let’s tackle SuiteCRM integration.
Create a CRM Campaign
Step 2: Create a Campaign in SuiteCRM
In SuiteCRM, we want all form data to flow neatly into the leads module. But before setting up forms, we need to create a campaign. This step is important as it’s a prerequisite for generating the form.
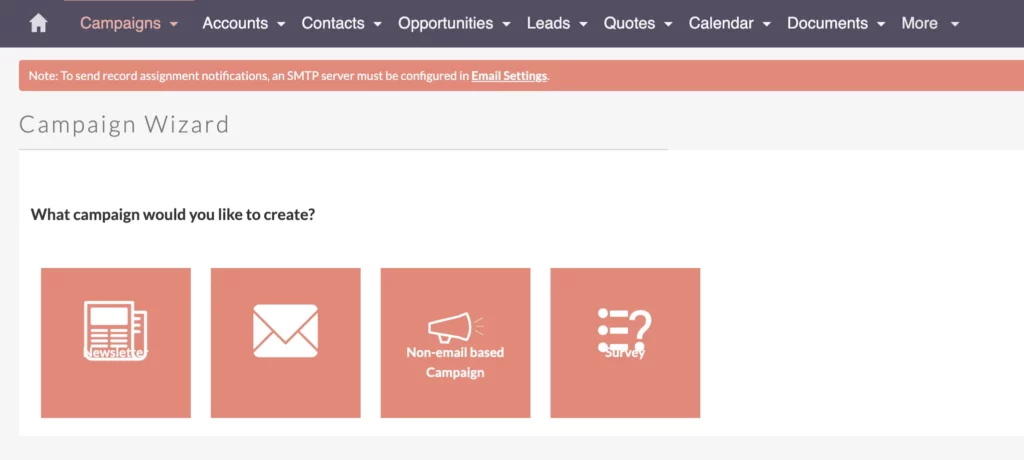
When you first install SuiteCRM, you won’t find any existing campaigns. Therefore, you’ll need to create a new one. Opt for a Non-email-based Campaign, which suits our purpose.
Campaign Header
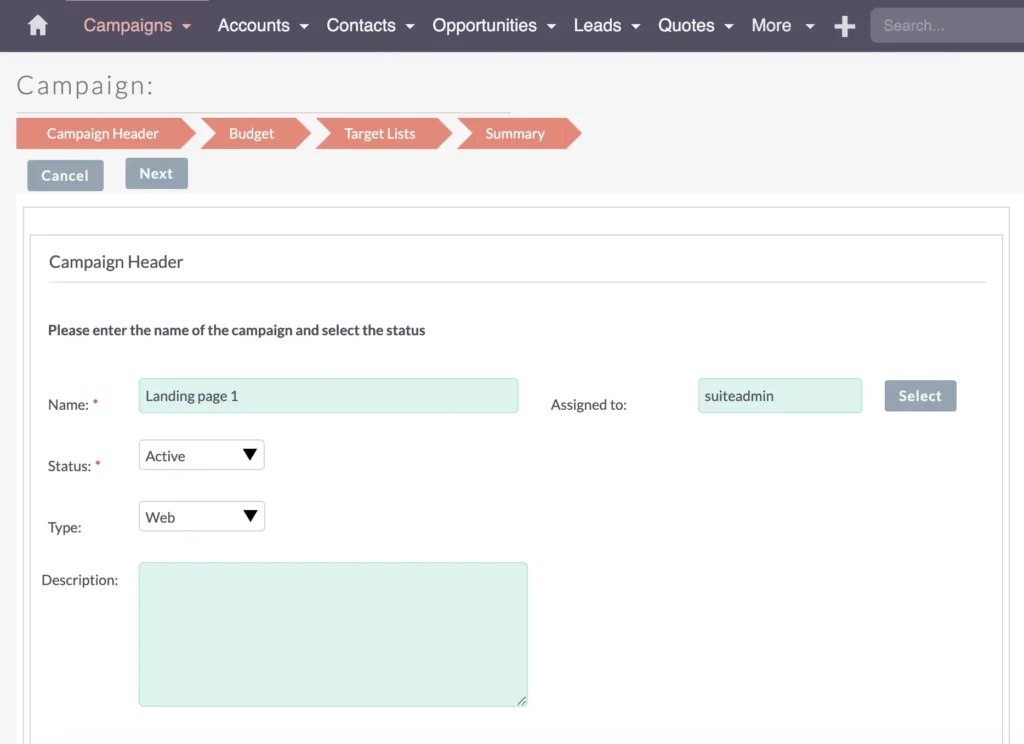
Now, let’s get into the details of setting up the campaign. Here’s what you need to define:
- Name – give it a name like “Landing Page 1” to easily associate it with the related page in WordPress.
- Status – set it to “Active” as we’re about to go live with it shortly.
- Type – define the campaign type as “web.”
Campaign Budget

You can allocate a budget if needed. This will come in handy for future reporting purposes. Later, you can analyze the effectiveness and return on investment (ROI) of your campaign. Be sure to check out my guide on SuiteCRM Reporting 101: A Beginner’s Guide to Mastering the Report Basics.
However, since I’m focusing on web forms, I won’t be dealing with target lists or immediate email dispatches for now. This campaign serves as the framework for the upcoming steps in building the web form.
Build and Export Lead/Contact Form
Step 3: Build the Form in SuiteCRM
Let’s move on to building the web form within SuiteCRM.
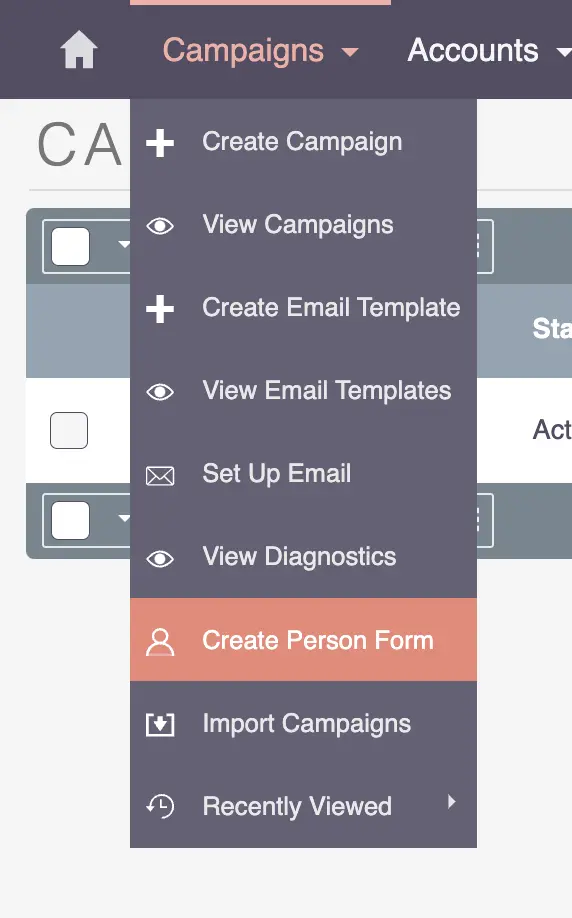
To start, head to the Campaigns section, and under More, you’ll find the option to Create Person Form.
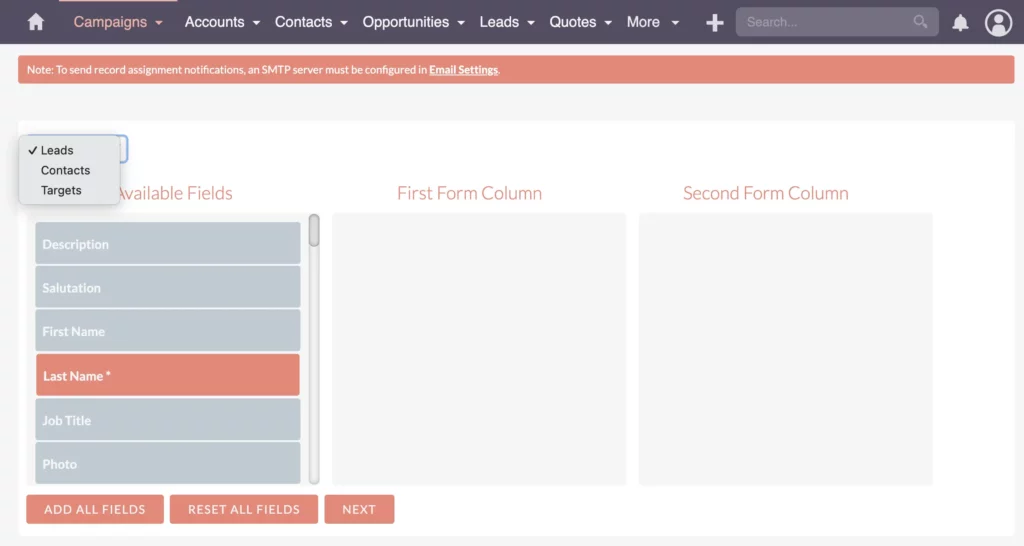
In this section, you’ll see three modules: Leads, Contacts, and Targets, each serving different purposes. For more detailed explanations, you can refer to my article post on Mastering SuiteCRM: A Quick Overview of Targets, Leads, Contacts, Accounts, and Opportunities.
Choosing Form Fields and Column Layout

Our main goal here is to capture leads, which requires certain fields. The last name is mandatory, but you may also want to include first name, office phone, email address, and account name (if applicable). Consider adding additional details like address, country, or mobile phone number, but be mindful not to overload the form with unnecessary fields.
Adding Form Header Details
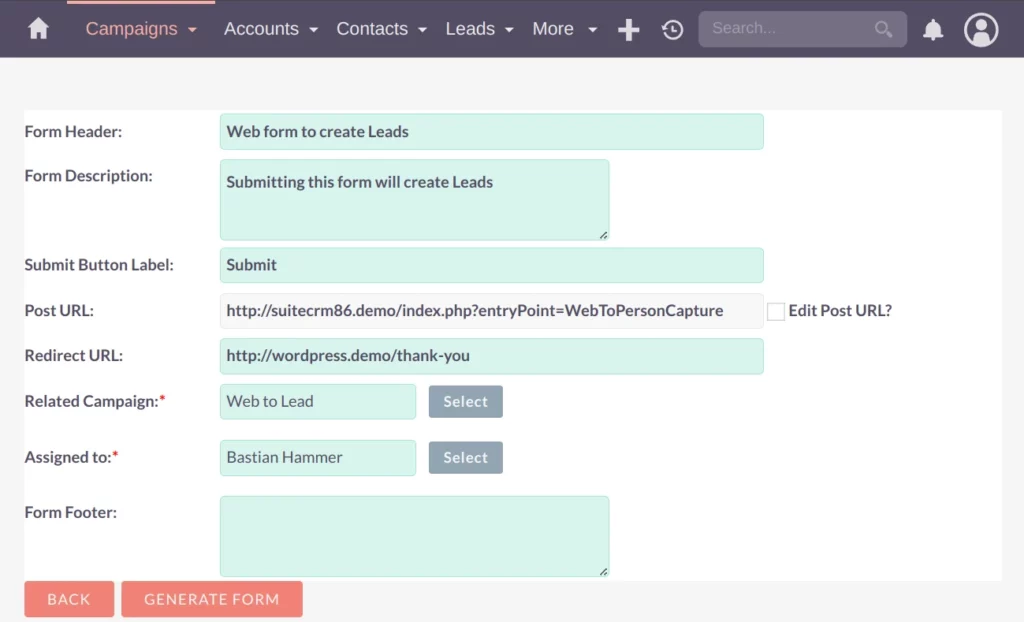
Next, let’s add some header data to the form, including the form header and description.
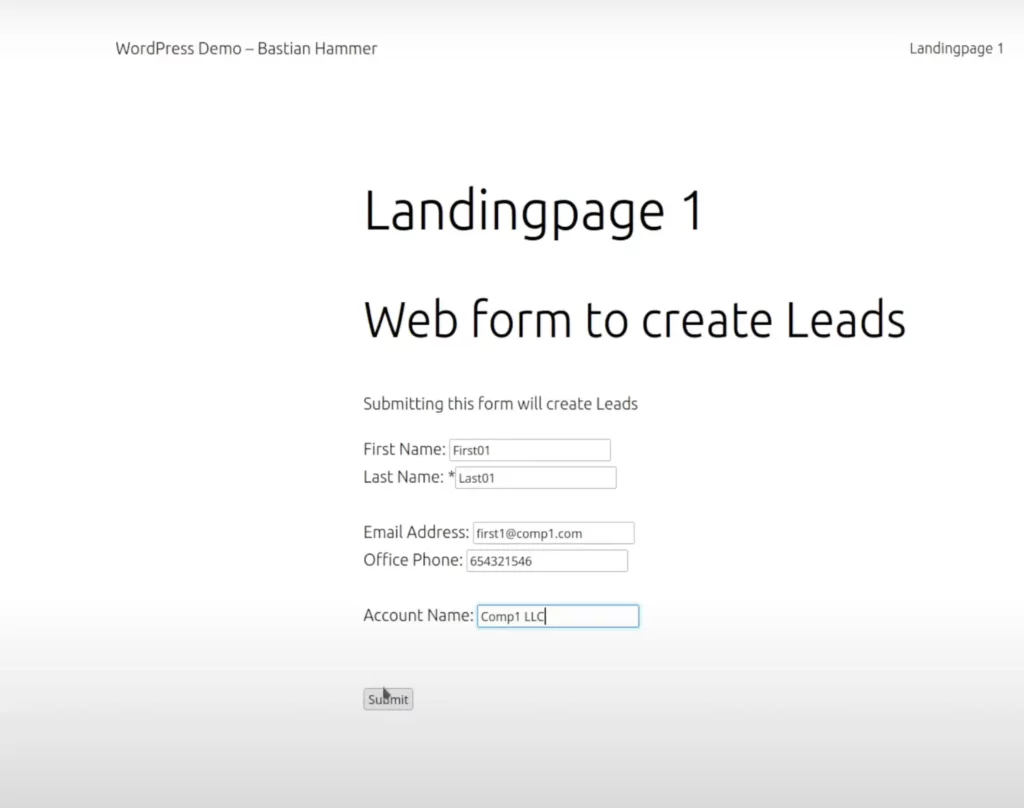
- Form Header: Web form to create Leads
- Description: Submitting this form will create Leads
- Submit Button Label: Submit
- Post URL: The post URL is automatically filled by SuiteCRM, directing where the information should be sent.
- Redirect URL: Similarly, the redirect URL should lead to a thank you page.
- Related Campaign: Select the campaign that was just created. This is why creating a campaign is essential as it serves as a prerequisite for this step.
- Assigned to: set this up
- Form Footer: set this up if you want to.
Once all the necessary details are filled, hit the Generate Form button. This will create the form, but remember, it might not perfectly align with your website’s design yet. You can adjust this later.
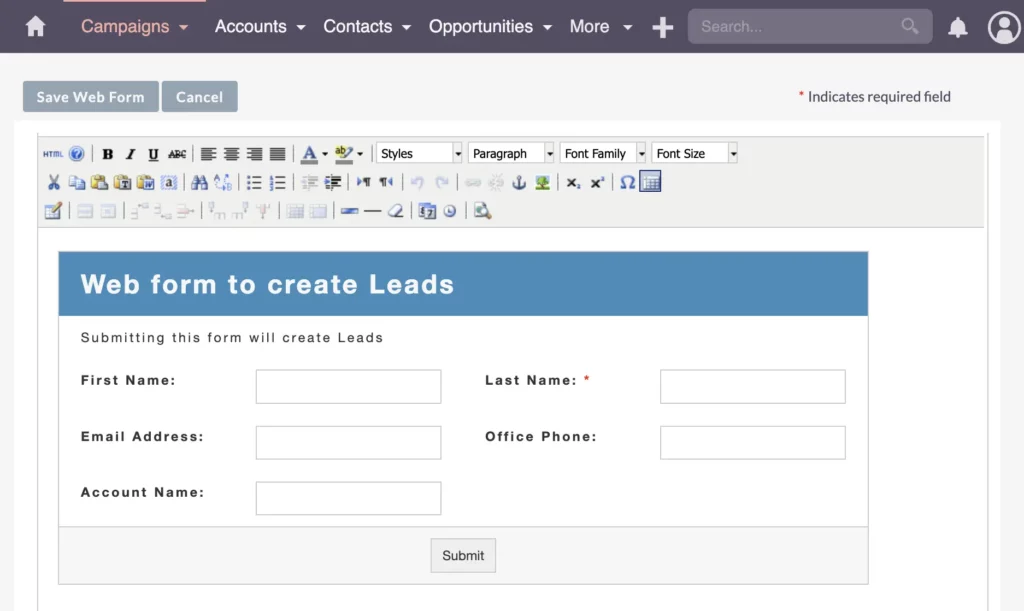
Copy the provided HTML code after generating the form. This code will be pasted into your WordPress page to display the form.
Integrate the Form into WordPress
Step 4: Integrate the Form into WordPress
Now, let’s bring that form over to your website. To do this, simply copy the HTML code. In most cases, you can achieve this by selecting the HTML code and copying it using the Ctrl + C shortcut.
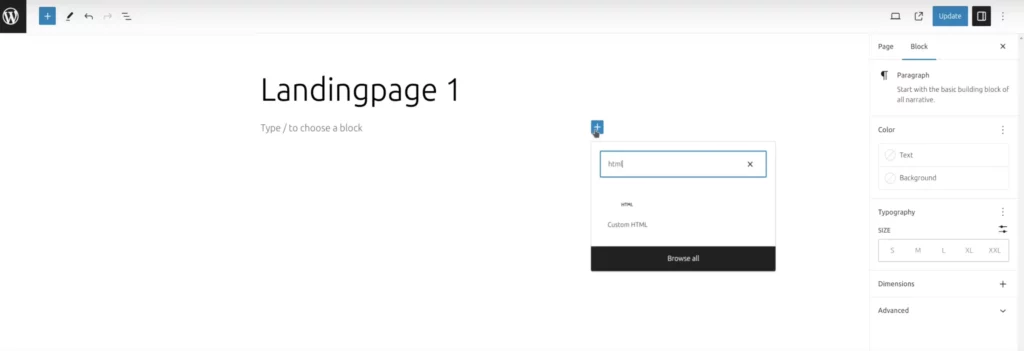
Once you’ve copied the HTML code, head over to your landing page on your website. Click on Edit and choose the option for adding a Custom HTML block. Paste the HTML code into this block, then update the page.
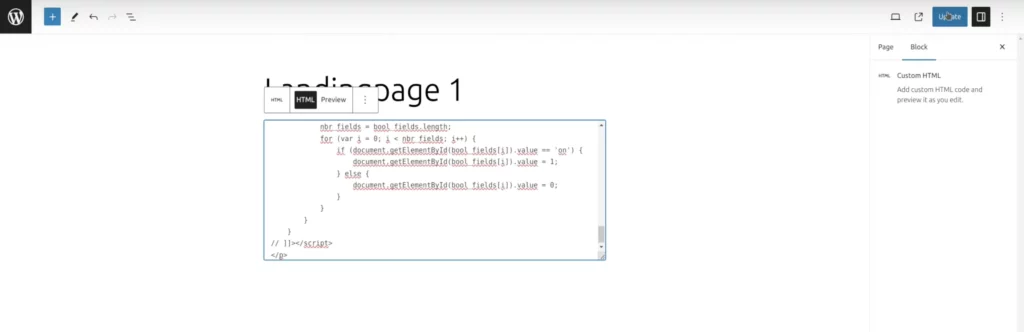
After updating the page, preview it as a visitor to ensure everything looks good. If you notice any formatting issues, don’t worry! Sometimes, the HTML code may contain some styles from SuiteCRM that conflict with your website’s design.
To fix this, you’ll need to remove the conflicting styles from the HTML code. Select and delete these styles, leaving only the essential code. Alternatively, you can adjust the styles directly within the HTML code, but it’s best to manage styling through your website’s CSS file for consistency.
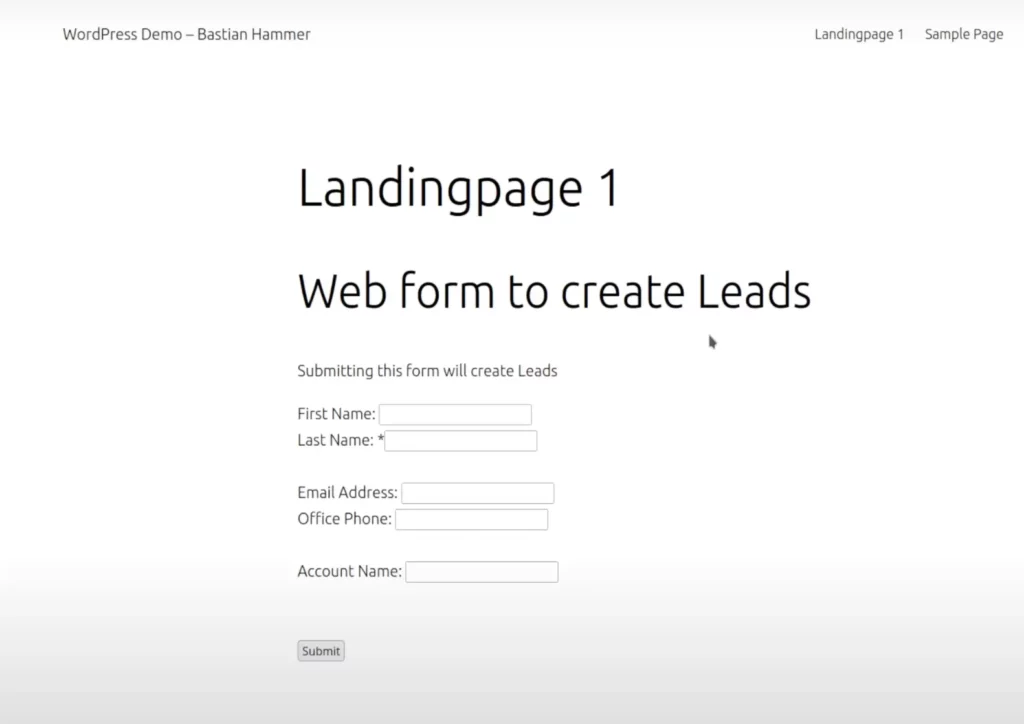
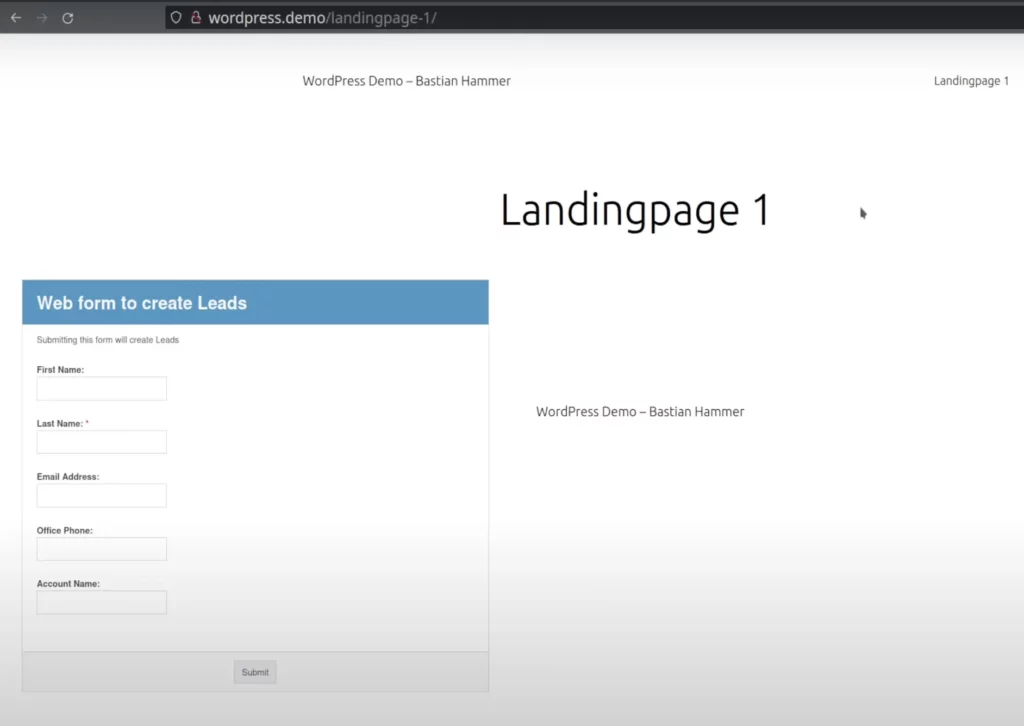
Once you’ve made the necessary adjustments, refresh the page to see the changes. While it may not look perfect, it should be functional. Now, it’s time to put it to the test and ensure it works as intended.
Testing the Form
Putting the Form to Test
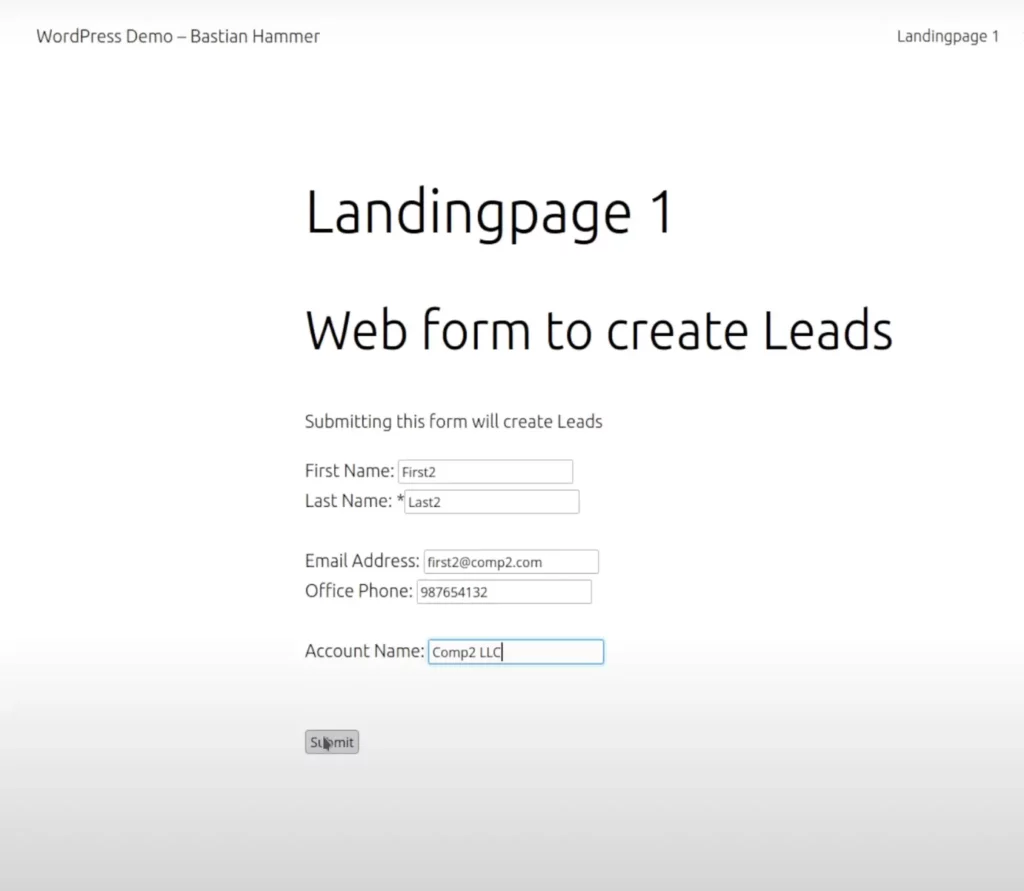
Let’s put the form to the test. I’ll fill in all the required fields: first name, last name, email address, office phone, and account name.
Upon submission, I’m directed to the Thank You Page, confirming that the form was successfully submitted.
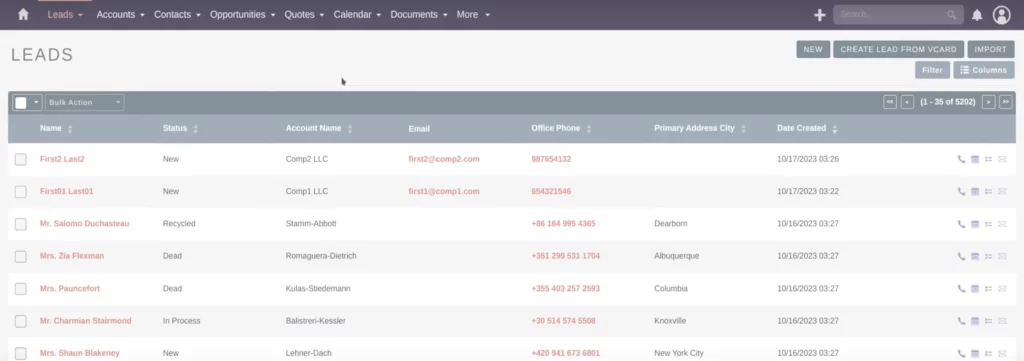
Now, let’s verify the data in SuiteCRM. By navigating to the Leads module, I can see the newly created lead at the top of the list view.
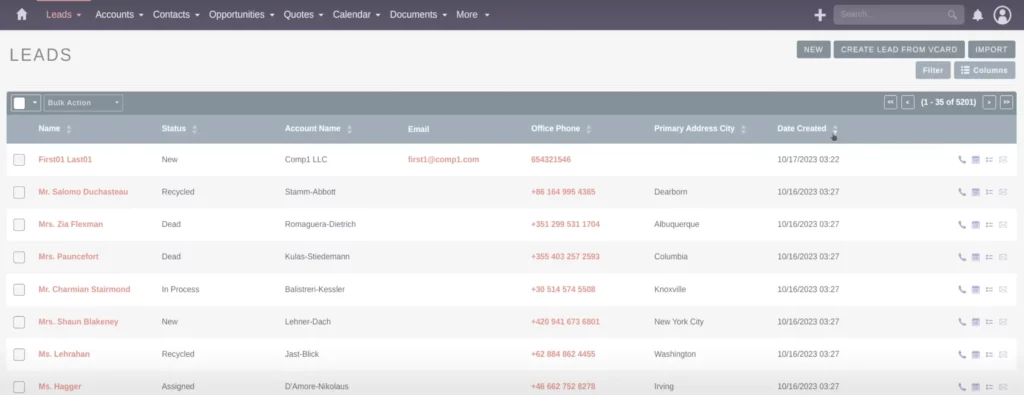
All the information entered – first and last name, office phone, company name, and email address – is all there.
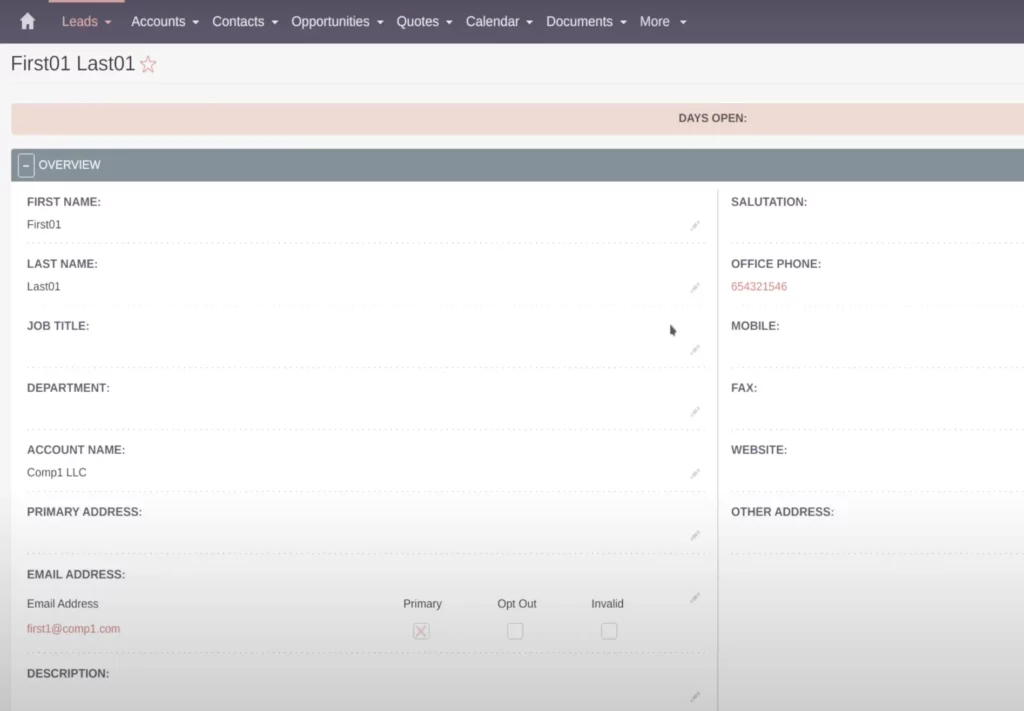
However, there are some missing details, like the Lead Source. This detail is important for understanding where the lead came from, especially when managing multiple campaigns or integrating different data sources. In such cases, you can specify the lead source, ensuring accurate data categorization and analysis.
Improving Data in SuiteCRM by Adding More (Hidden) Fields
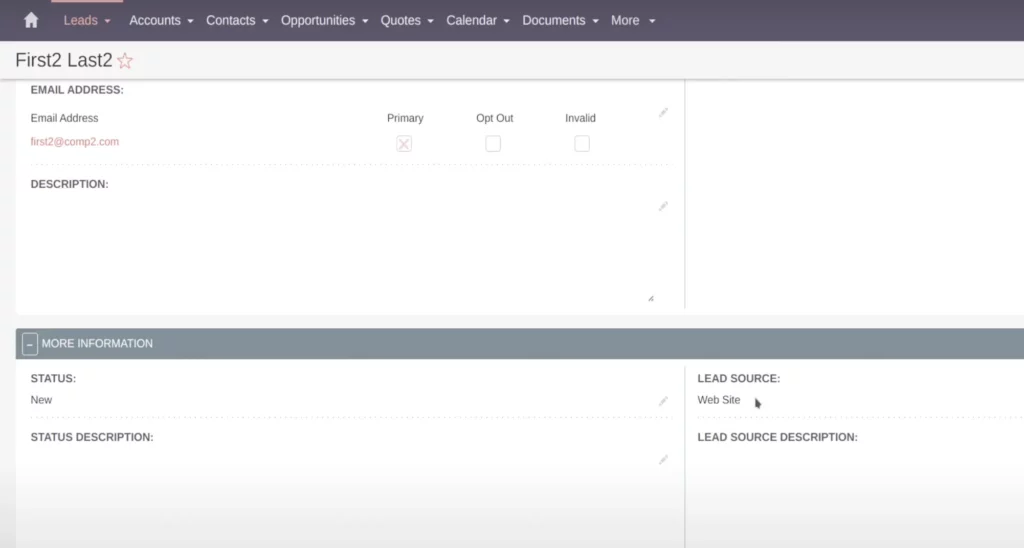
Right now, the lead data isn’t complete. Although the lead status is marked as new, we’re missing details about the lead source. This is helpful, especially when managing multiple campaigns or integrating various data sources into your CRM system.
How to Get the Source Code
To rectify this, we’ll need to specify the lead source.
- You can either access the source code of the website directly, or
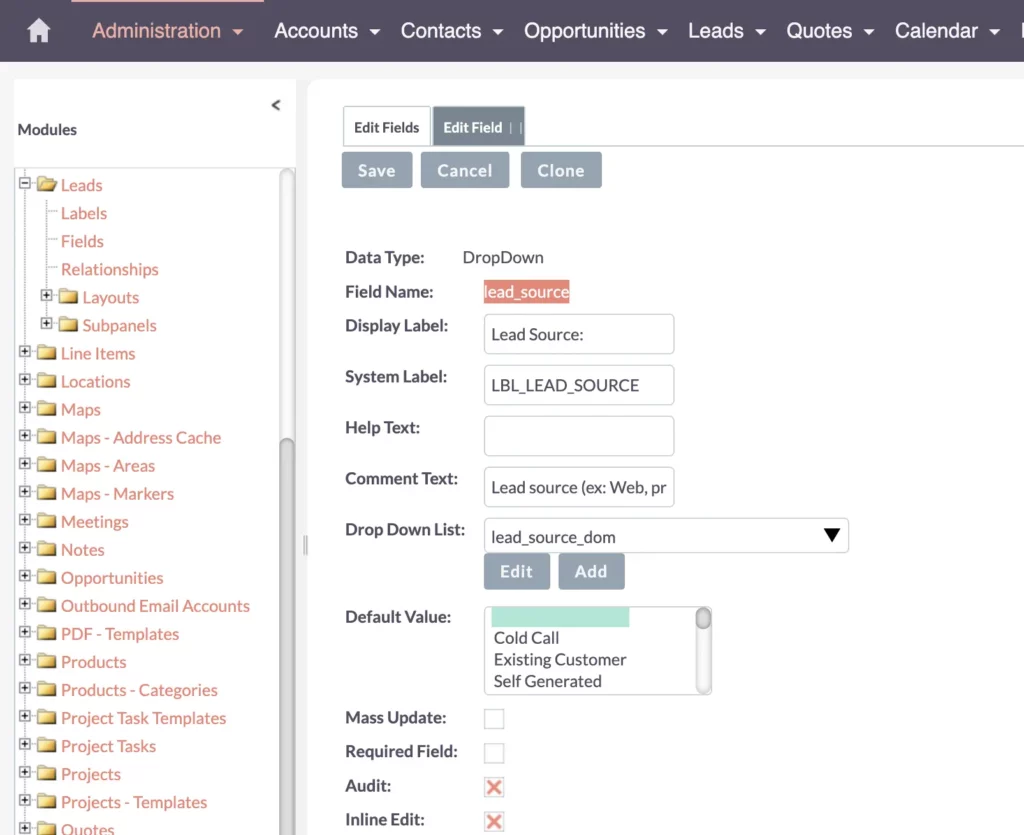
- Navigate through the Admin Panel to the Studio. In Studio, locate the Leads module, then go to Fields, and find the Lead Source field. Take note of the field name, which is “lead_source.”
How to Add Hidden Fields
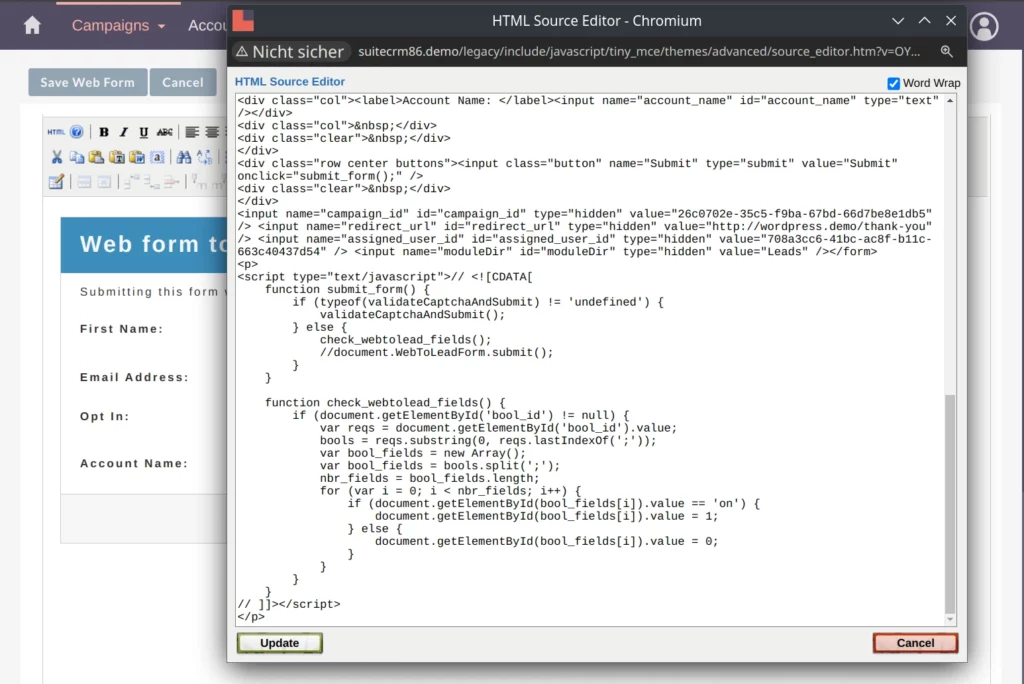
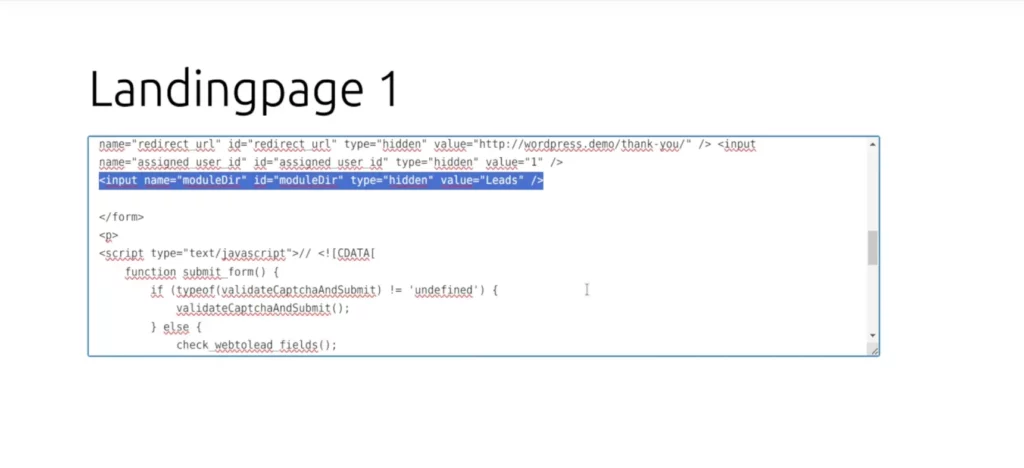
In your Landing Page’s HTML, you’ll notice SuiteCRM has already generated some hidden fields for you, such as the module directory. This hidden field, often associated with the Lead category, directs data based on its type, like Leads, Targets or Contacts.
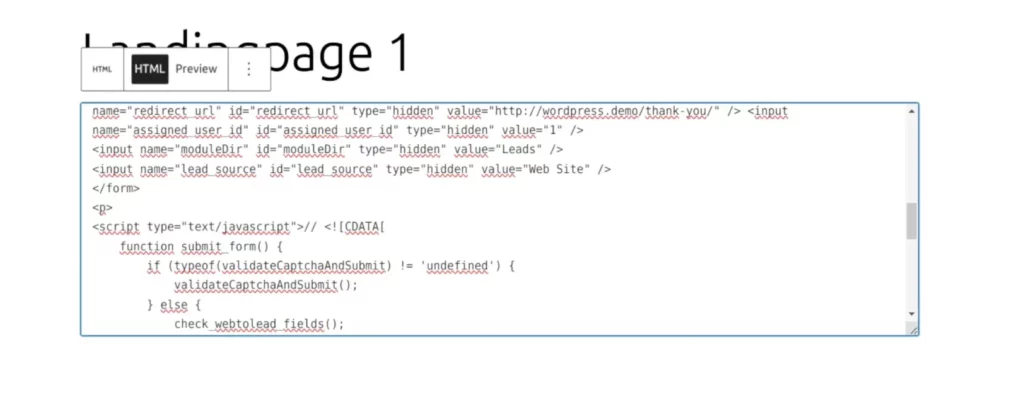
Copy the line of code for the hidden field and paste it into your WordPress page. Adjust the field to include the lead source information.
<input name=“lead_source” id=“lead_source” type=“hidden” value=“Web Site” />Note: Make sure the value matches exactly your desired source. It should exactly fit the label. No spaces in front or behind it.
Testing the Hidden Fields
After updating the WordPress page, refresh it to ensure the hidden field is present (though it won’t be visible since it’s hidden). Now, it’s time to do a second test of the form by submitting a lead.
Returning to the Leads list view, I can confirm that the second lead has been successfully transferred.
With the lead source accurately filled, we can now generate reports based on this data. These reports provide valuable insights into lead sources, helping assess campaign effectiveness and website performance.
You have the flexibility to tailor reports to your needs, whether focusing solely on lead sources like websites or creating dynamic dropdowns for detailed analysis. If you’re keen on learning more about creating dynamic fields, check out my detailed video explanation: Supercharge Your SuiteCRM: Master Field Customization for Maximum Efficiency.
Customization and Security
Additional Considerations: Customization and Security
Now that we’ve successfully integrated our website with the SuiteCRM system, it’s important to consider customization and security aspects. While SuiteCRM’s online accessibility is convenient, some users prioritize additional security measures, such as VPNs, to protect sensitive data.
Security
In certain scenarios, your SuiteCRM instance might not be directly accessible online, especially if it’s behind a VPN or completely offline for security purposes.
For instance, in one of my projects, the CRM system was situated behind a VPN / internal network. Therefore, direct website integration was not possible.
To overcome these challenges, I have set up a middleware solution. This involves creating a PHP script that acts as a bridge between your website and SuiteCRM. This script resides on a server that can access both the website and the CRM system, facilitating data transfer securely.
Customization and Design
Your web developer can customize the CF7 module on WordPress to align with your website’s design aesthetics. Once customized, replace the SuiteCRM form with this WordPress form. If applicable, ensure the WordPress form is configured to send data to the middleware script, which then forwards it to SuiteCRM.
This approach offers the best of both worlds. It allows you to customize forms according to your website’s design while guaranteeing secure data transmission to SuiteCRM. Whether your CRM is offline or behind a VPN, this solution ensures a seamless and protected data transfer process.
Recap
SuiteCRM and WordPress Integration – Recap
Let’s do a quick recap of the steps we’ve taken for the SuiteCRM and WordPress integration. We’ve achieved this seamlessly in just 4 simple steps.
- Prepare Your WordPress Pages – firstly, we set up two essential pages on your WordPress website: the form page and the thank you page. These pages form the core for capturing leads and acknowledging submissions.
- Set Up Campaigns in SuiteCRM – next, we created a campaign within SuiteCRM. This step is vital as it serves as a prerequisite for generating the form and enables the generation of insightful reports later on.
- Build Your Form – then, we built the form itself. However, we didn’t stop there. We also ensured that the form’s design was somewhat aligned with your website’s aesthetics. However, design is a different chapter and you can take that way further.
- Integrate the Form into WordPress – lastly, we copied the form into your WordPress website. While doing so, we may have made slight adjustments to the design to ensure it blends with your website’s overall look and feel.
Moreover, we explored adding hidden fields to the form. These hidden fields can automatically transfer data to SuiteCRM, streamlining the lead capture process and enhancing reporting capabilities.
And there you have it! With these simple steps, your WordPress website is now seamlessly integrated with SuiteCRM, enhancing your lead management capabilities. Thank you for reading, and until next time!